Install Proxmox VE 8 Standalone with ZFS Backend Storage
Environment
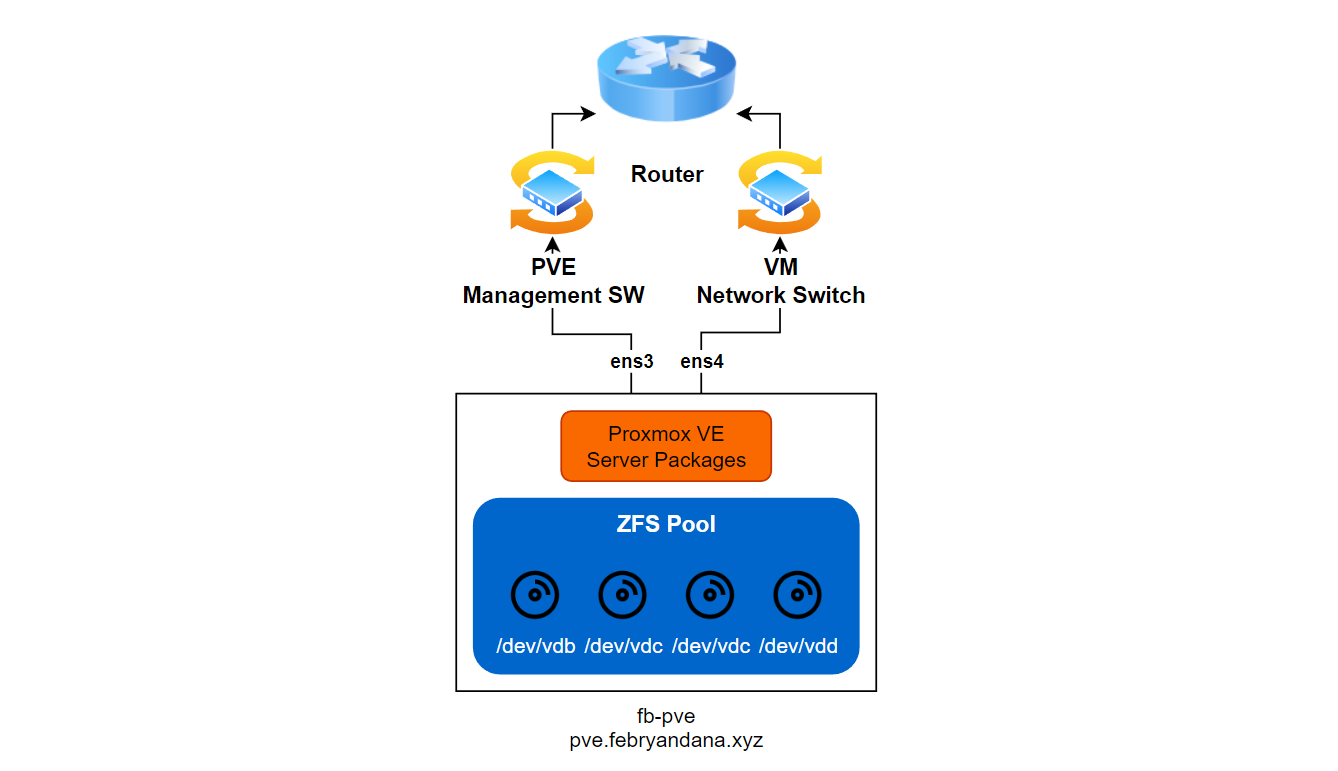
Diagram Architecture
Hardware Specification
| Hardware | Detail | Description |
|---|---|---|
| CPU | 8 CPU | vCPU on top KVM |
| RAM | 16 GB | No Swap memory |
| Boot Disk | 60 GB | No RAID or LVM |
| ZFS Disks | 4x50 GB | Using RAIDZ1 (RAID 5) |
| Network 1 | 172.20.11.200/24 | For node management access |
| Network 2 | 172.20.12.200/24 | For VM network access |
Software Specification
| Software | Version |
|---|---|
| Hostname | fb-pve |
| Domain | pve.febryandana.xyz |
| Operating System | Debian 12 |
| Proxmox VE | 8.0 |
| ZFS | v2.1.12 |
Preparation
Disable managed hosts file from CloudInit
This step is necessary if you use Debian cloud-image because if set true, /etc/hosts file will reset every reboot. Otherwise skip it.
1
2
3
4
nano /etc/cloud/cloud.cfg.d/01_debian_cloud.cfg

---
manage_etc_hosts: false
Update Root Password
1
2
3
passwd

#New password: Brawijaya302
Update Network
1
2
3
4
5
6
7
8
9
10
11
12
13
14
15
16
17
18
19
20
21
nano /etc/network/interfaces.d/50-cloud-init

---
auto lo
iface lo inet loopback

auto ens3
allow-hotplug ens3
iface ens3 inet static
    address 172.20.11.200/24
    dns-nameservers 1.1.1.1
    gateway 172.20.11.1
    metric 100

auto ens4
allow-hotplug ens4
iface ens4 inet static
    address 172.20.12.200/24
    dns-nameservers 1.1.1.1
    gateway 172.20.12.1
    metric 200
Because Debian doesn’t have netplan, we need to reboot the node to make changes take effect.
1
reboot
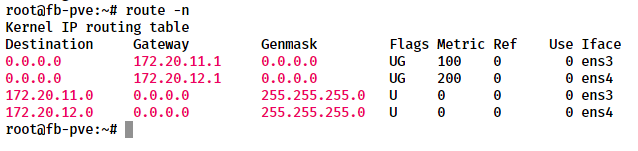
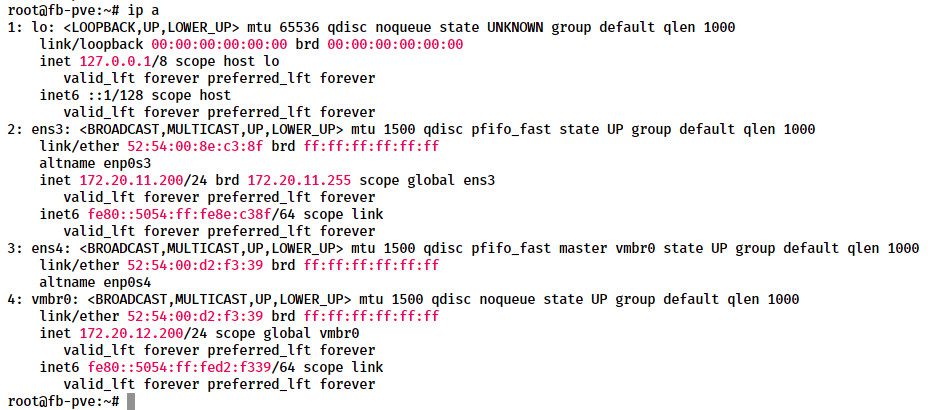
Routing Table:
Update Hostname
1
hostnamectl set-hostname fb-pve
Update Timezone
1
timedatectl set-timezone Asia/Jakarta
Update Hosts Files
1
2
3
4
5
6
nano /etc/hosts

---
127.0.0.1 localhost
172.20.11.200 pve.febryandana.xyz fb-pve
...
Proxmox Deployment
Add Proxmox Kernel to System
Add Proxmox VE repository.
1
 echo "deb [arch=amd64] http://download.proxmox.com/debian/pve bookworm pve-no-subscription" > /etc/apt/sources.list.d/pve-install-repo.list
Add Proxmox VE repository key.
1
 wget https://enterprise.proxmox.com/debian/proxmox-release-bookworm.gpg -O /etc/apt/trusted.gpg.d/proxmox-release-bookworm.gpg
Update system packages to latest version.
1
 apt update && apt full-upgrade -y
Install Proxmox VE Kernel 6.2.
1
2
3
 apt install pve-kernel-6.2 -y

 systemctl reboot
Install Proxmox VE 8
Install Proxmox packages.
1
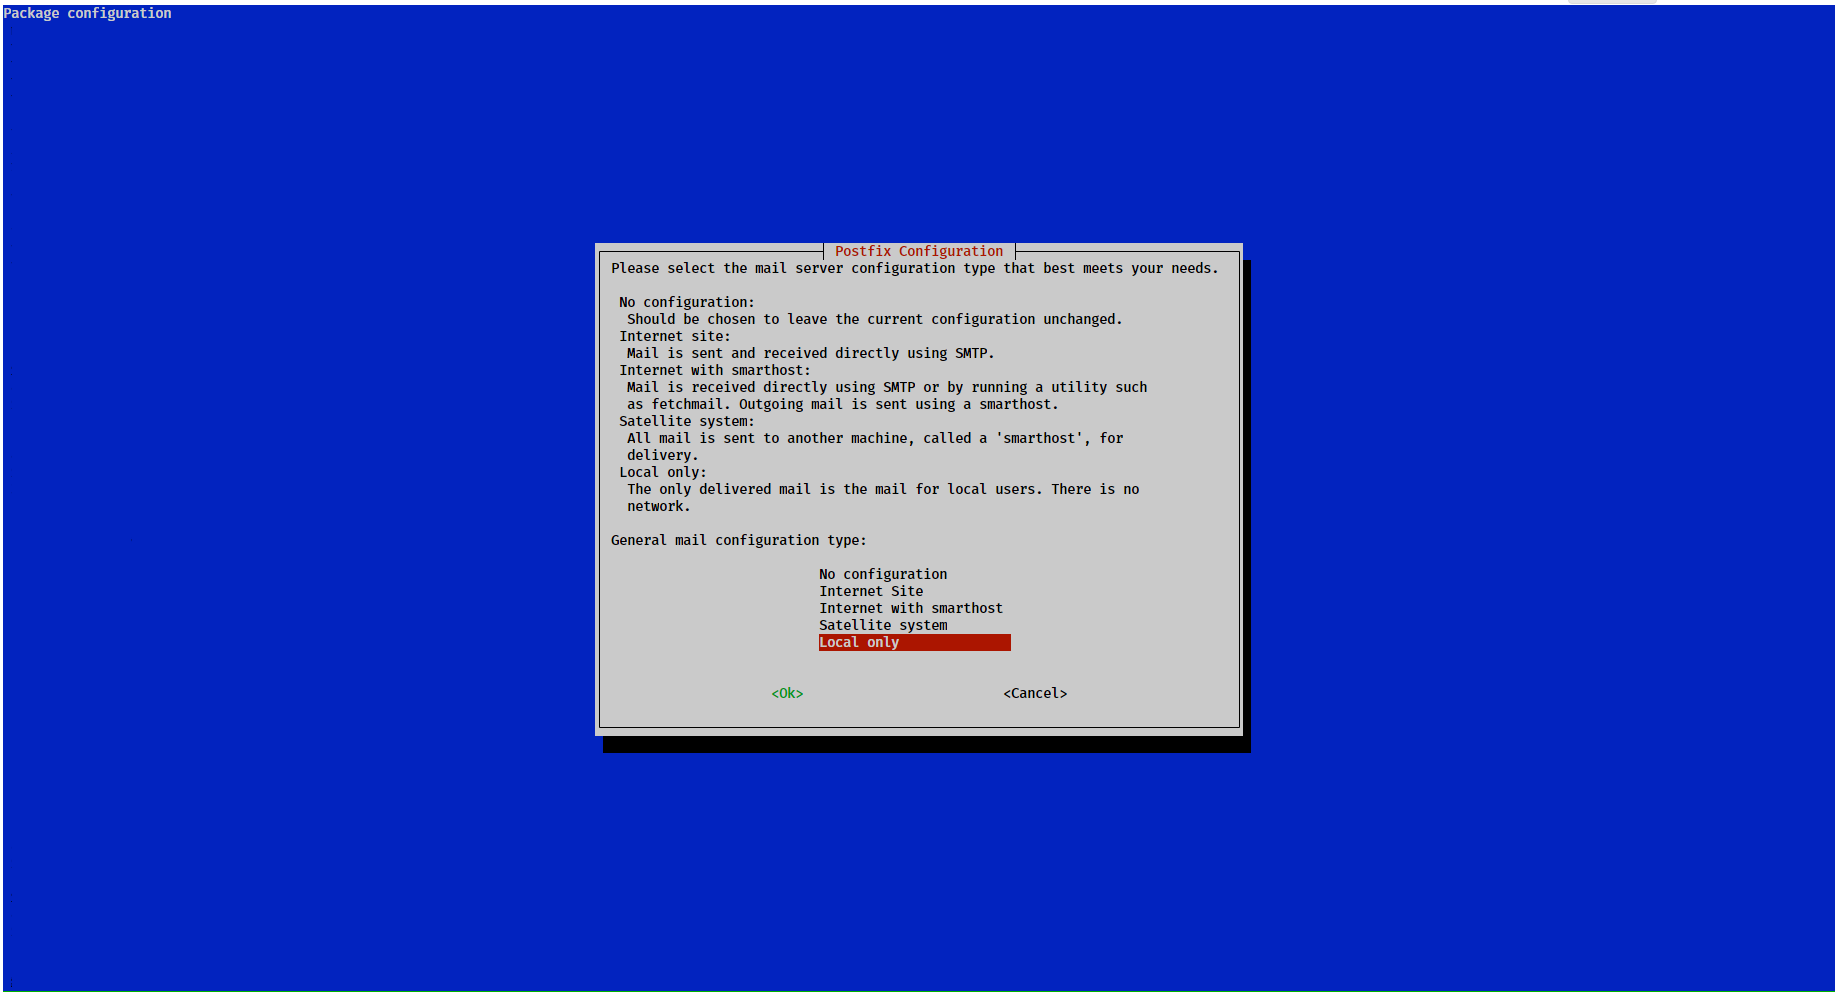
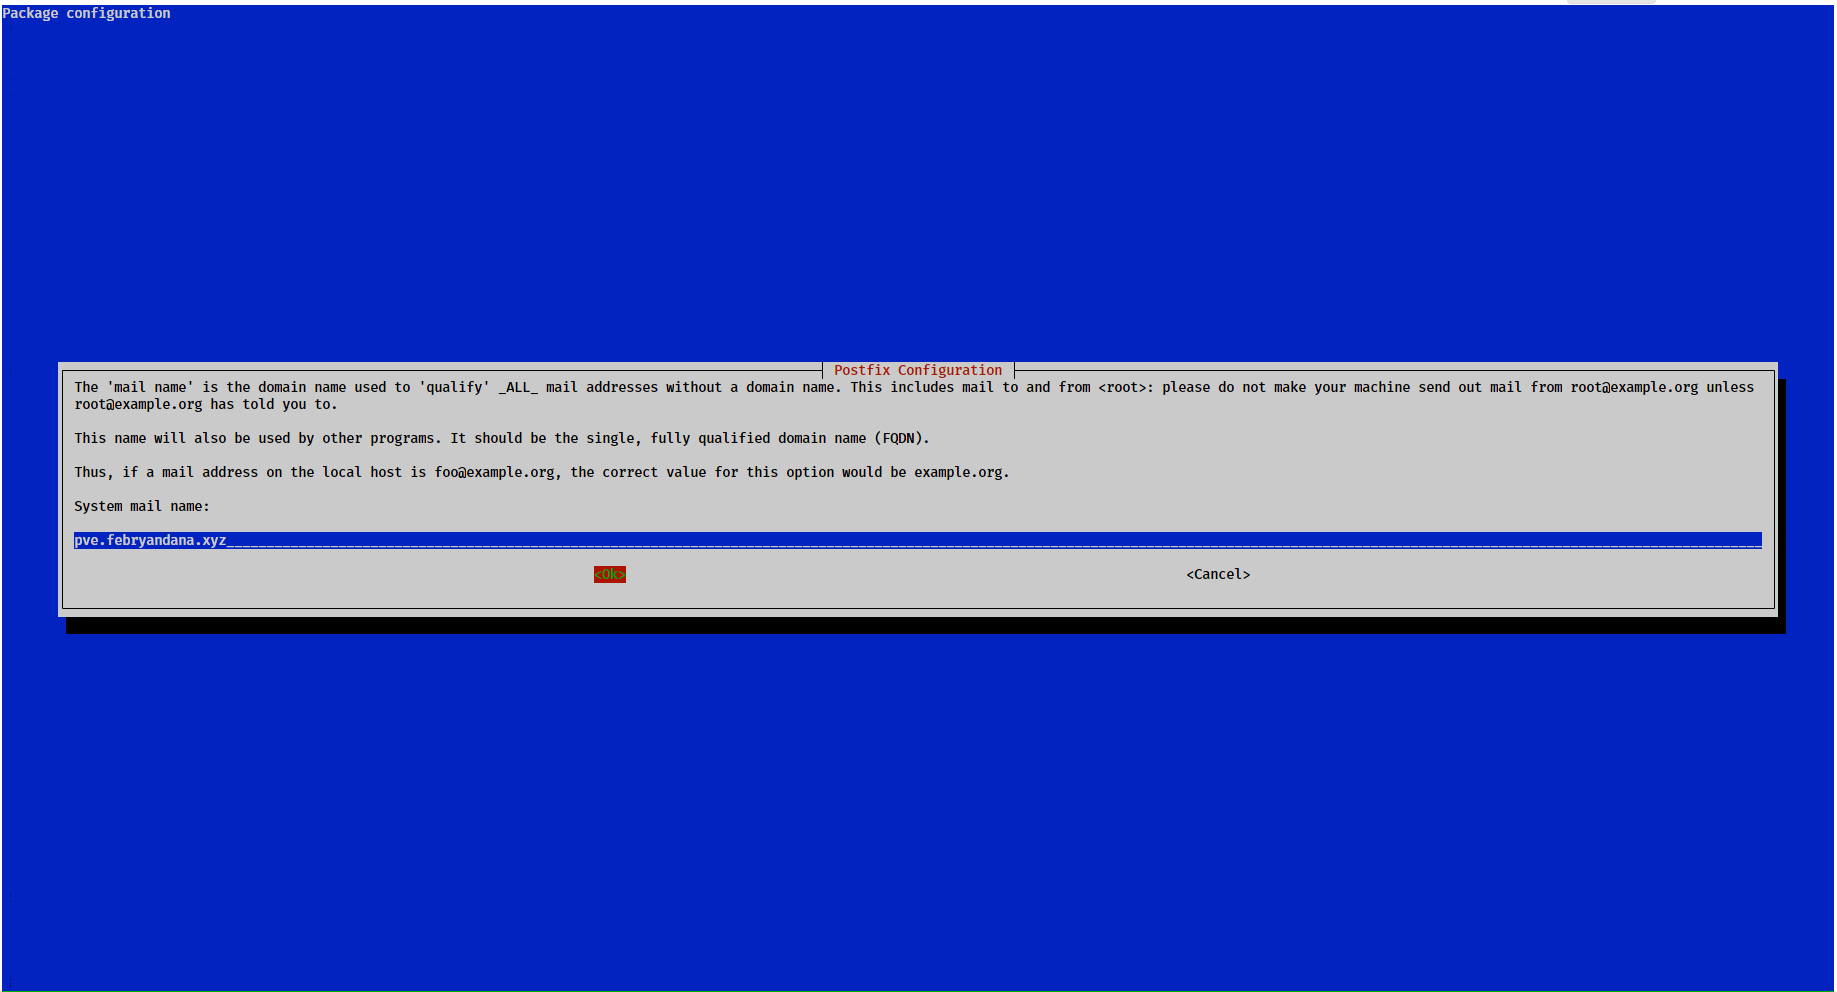
apt install proxmox-ve postfix open-iscsiIf you don’t have Mail Server, choose Local only for Postfix configuration.
Use default setting provided. It should be our PVE domain if we add it in
/etc/hostsfile.
Remove Debian kernel.
1
 apt remove linux-image-amd64 'linux-image-6.1*'
Remove os-prober packages.
1
 apt remove os-prober
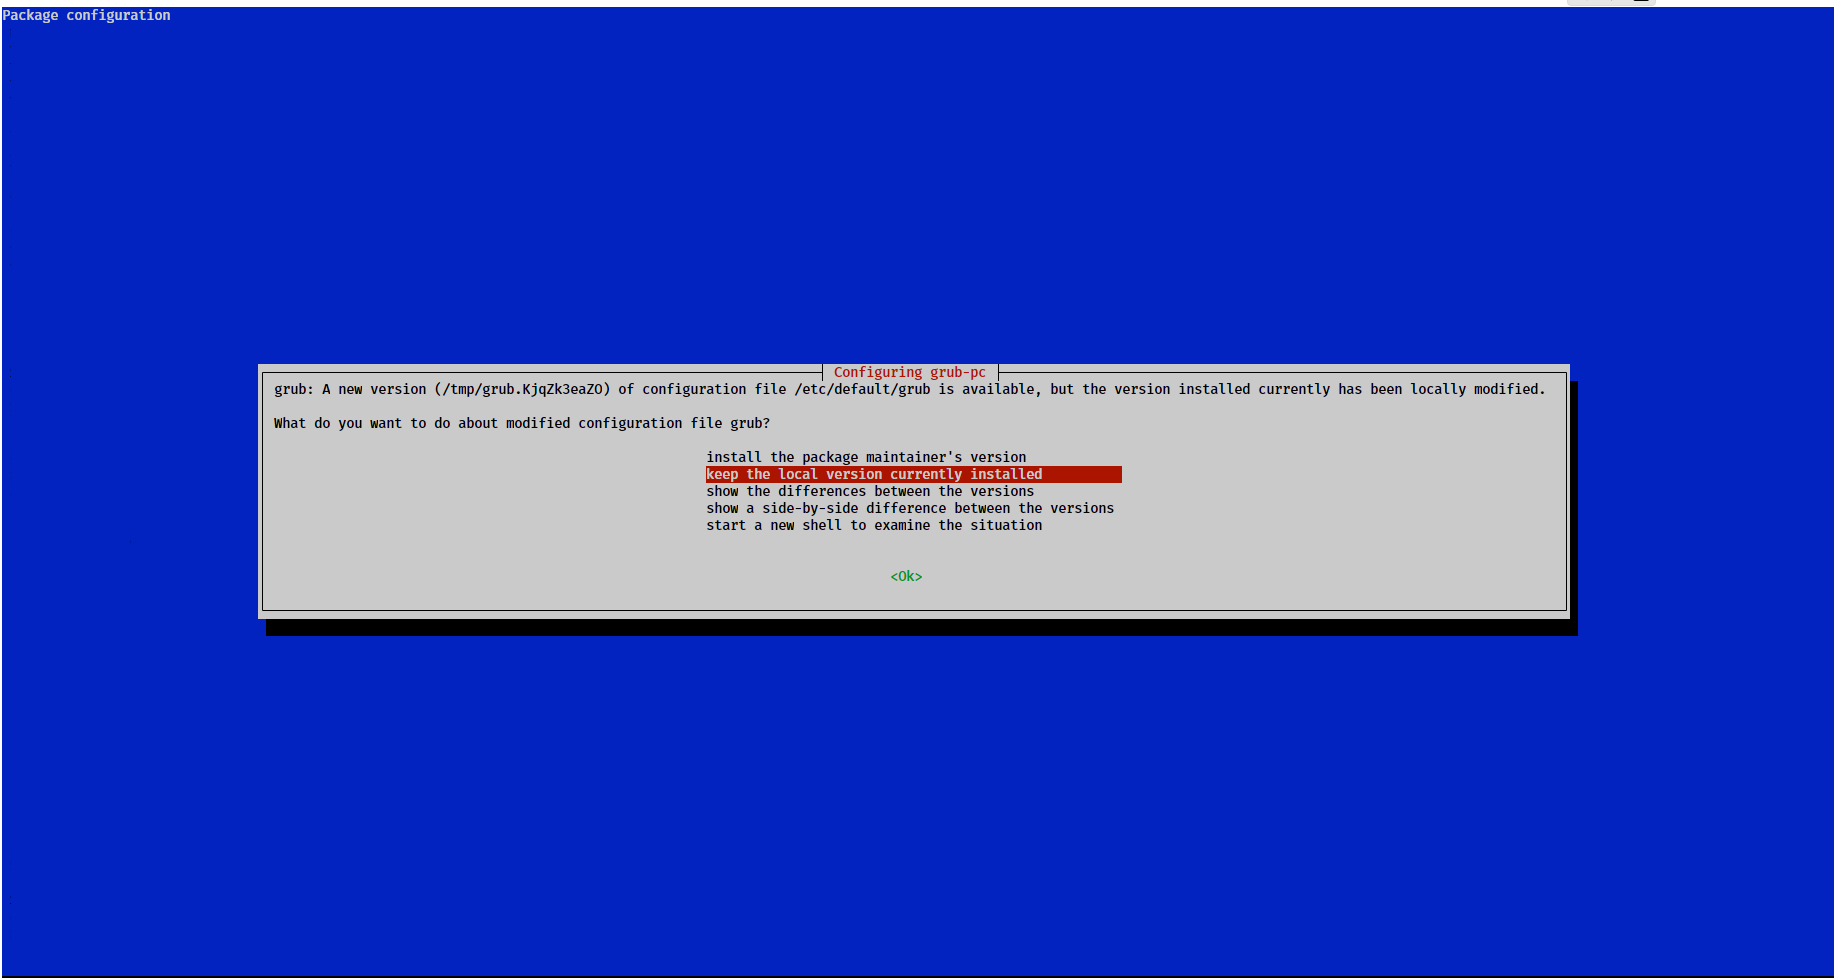
Update grub entry.
1
 update-grub
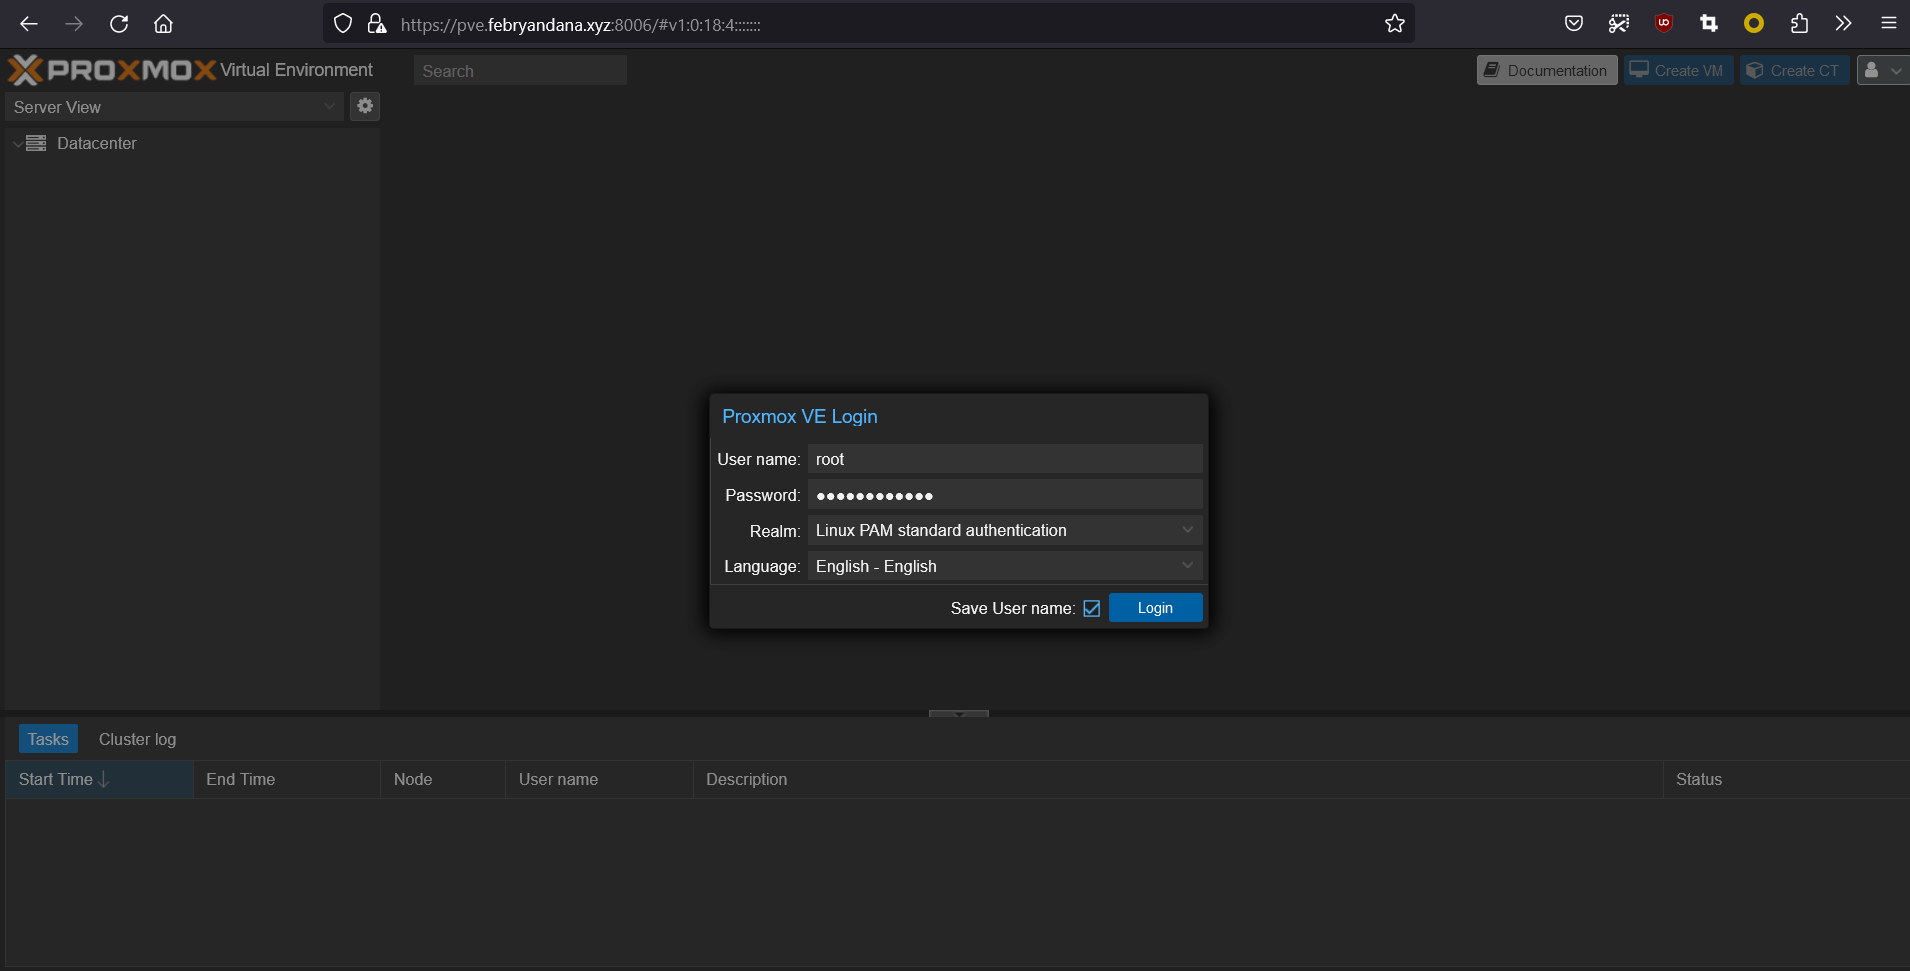
Now we can connect to Proxmox VE via web with self sign SSL certificates:
- fb-pve: https://pve.febryandana.xyz:8006
Login using root user/password and use Linux PAM standard authentication for Realm.
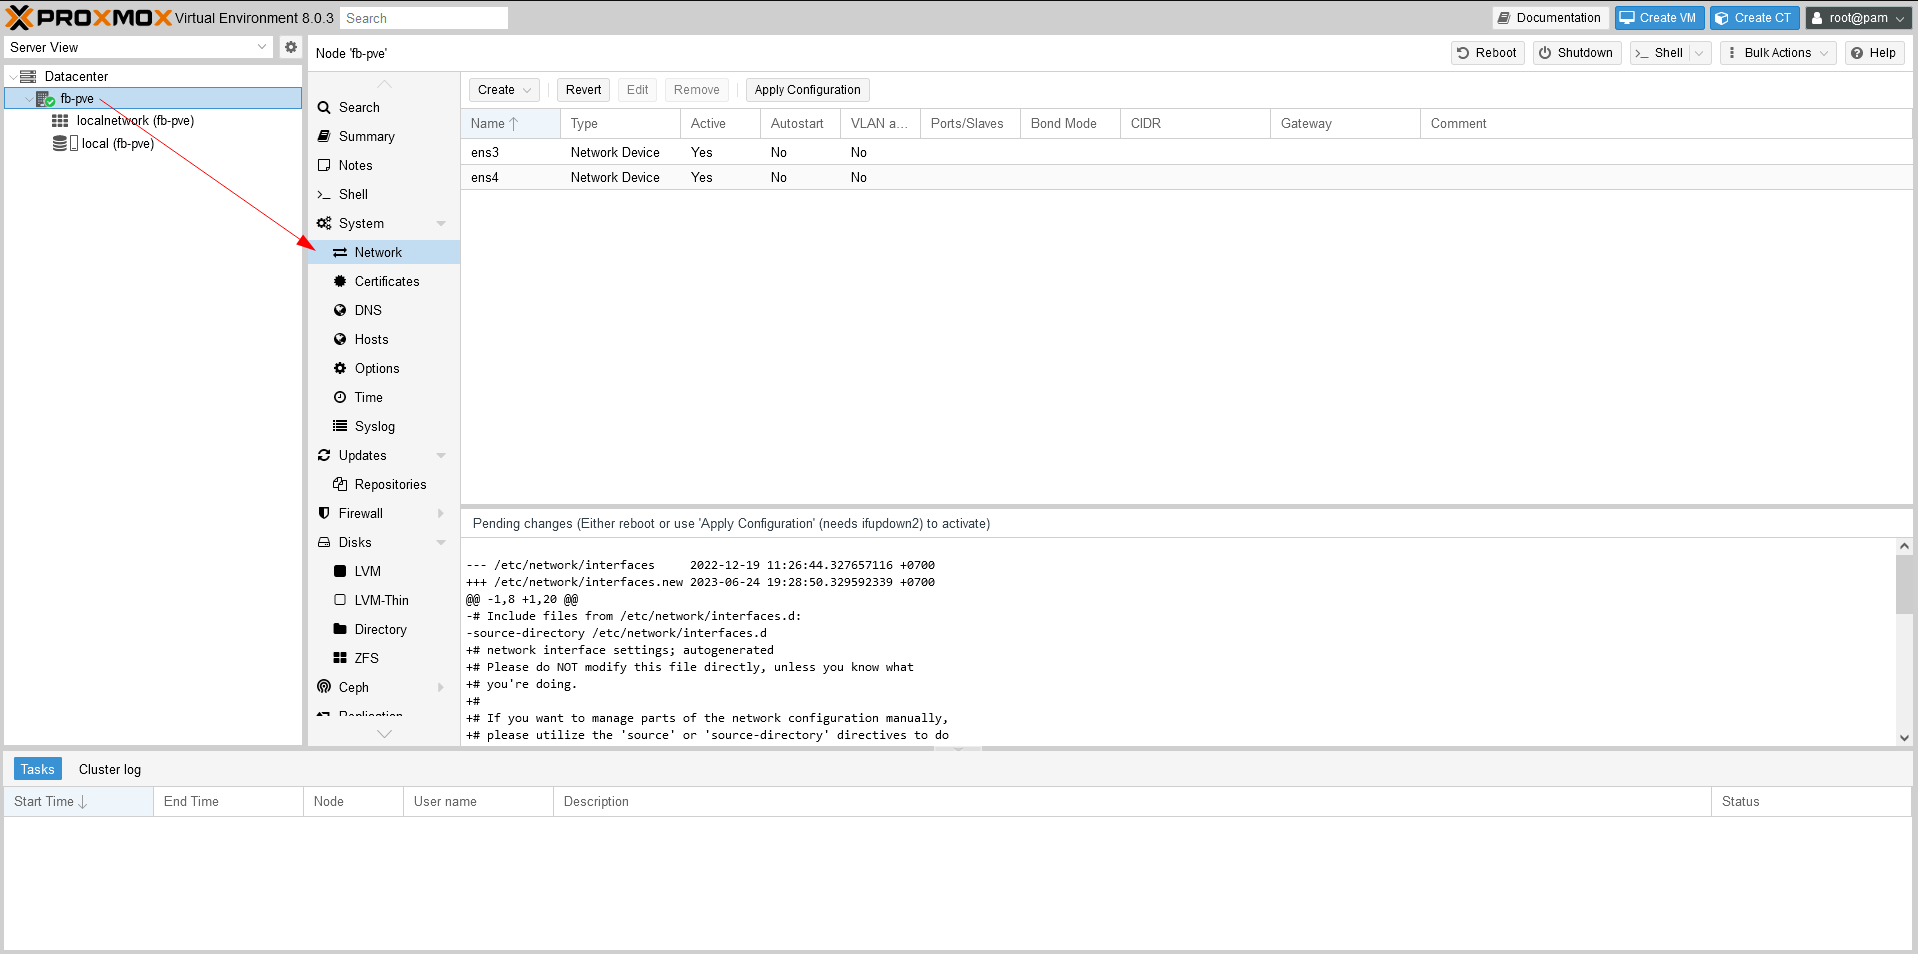
Update PVE Network
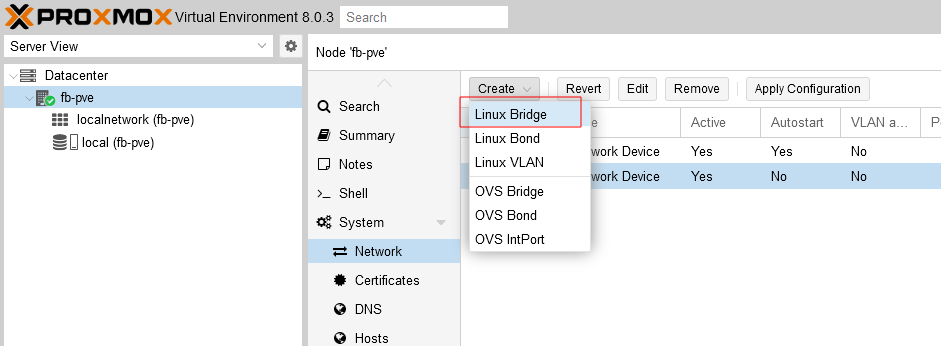
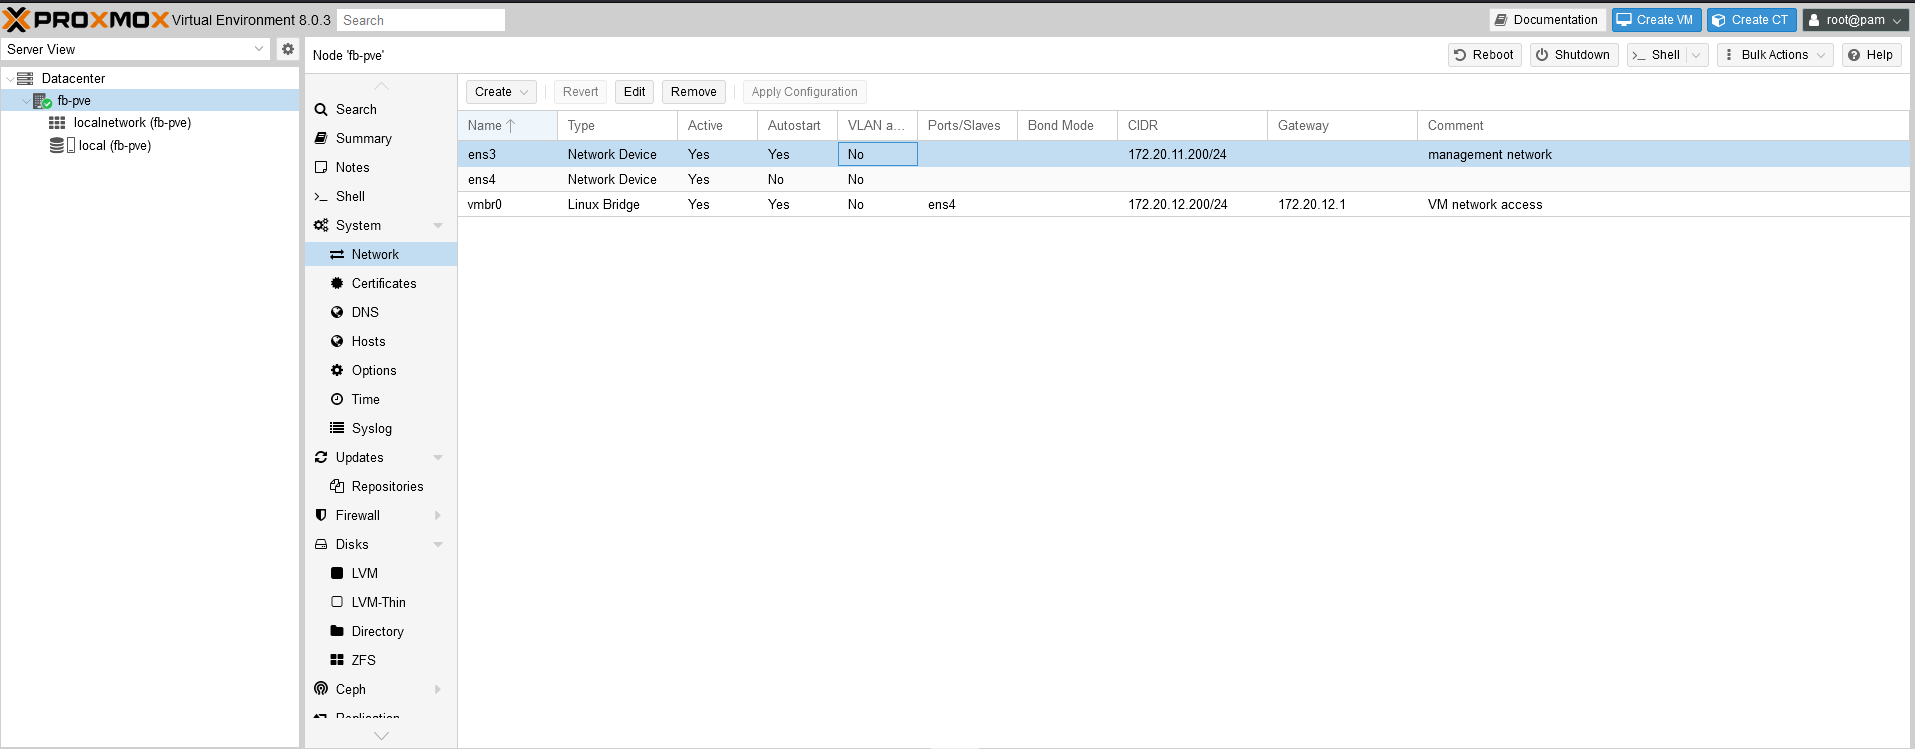
Modify the network from inside cluster.
- Select Datacenter from left menu.
- Then select node hostname.
- Then select System drop down menu and choose Network.
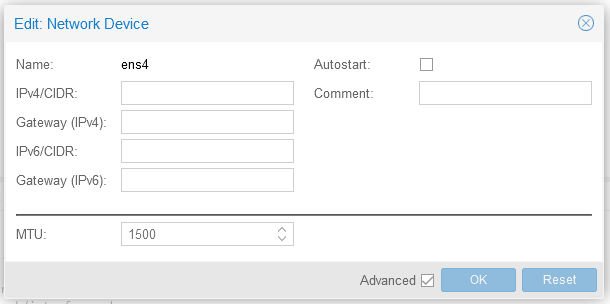
Select NIC name and click Edit.
Update network configuration:
ens3: This NIC will be used as management port for proxmox server.
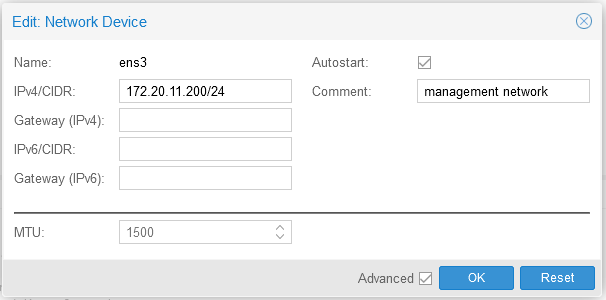
ens4: Use blank config for ens4 because we will use it for bridging.
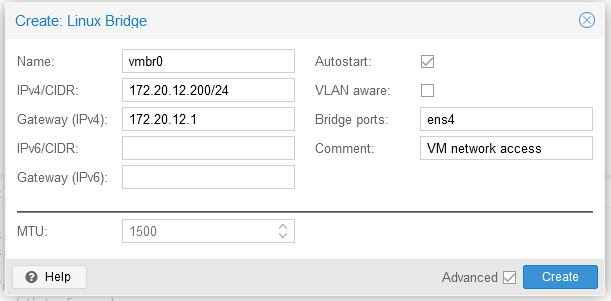
vmbr0: Create Linux bridge network for VMs network access.
Click Apply Configuration.
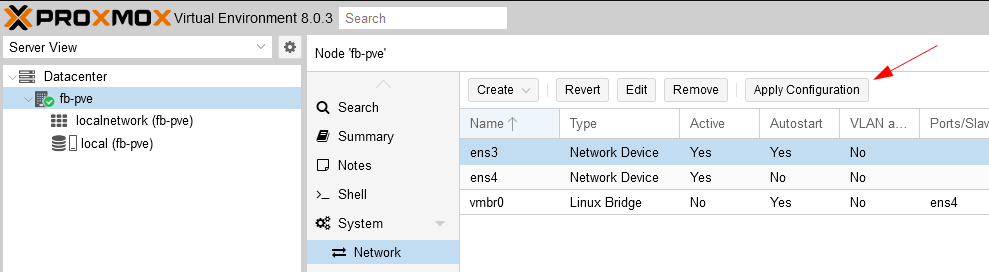
After configuration is applied, verify that Proxmox VE server use the correct NIC and IP Address:
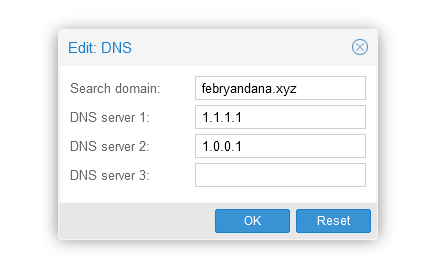
Update DNS Settings
We need to add DNS Server so Proxmox can connect to internet for downloading update, ISO files, etc.
- From System menu, select DNS.
- Click DNS server 1 and Edit.
Update Proxmox Repository
Because we only use the free version of Proxmox, we don’t need the enterprise repository.
- From node menu, select Updates then Repositories.
Select enterprise repository file and click Disable.
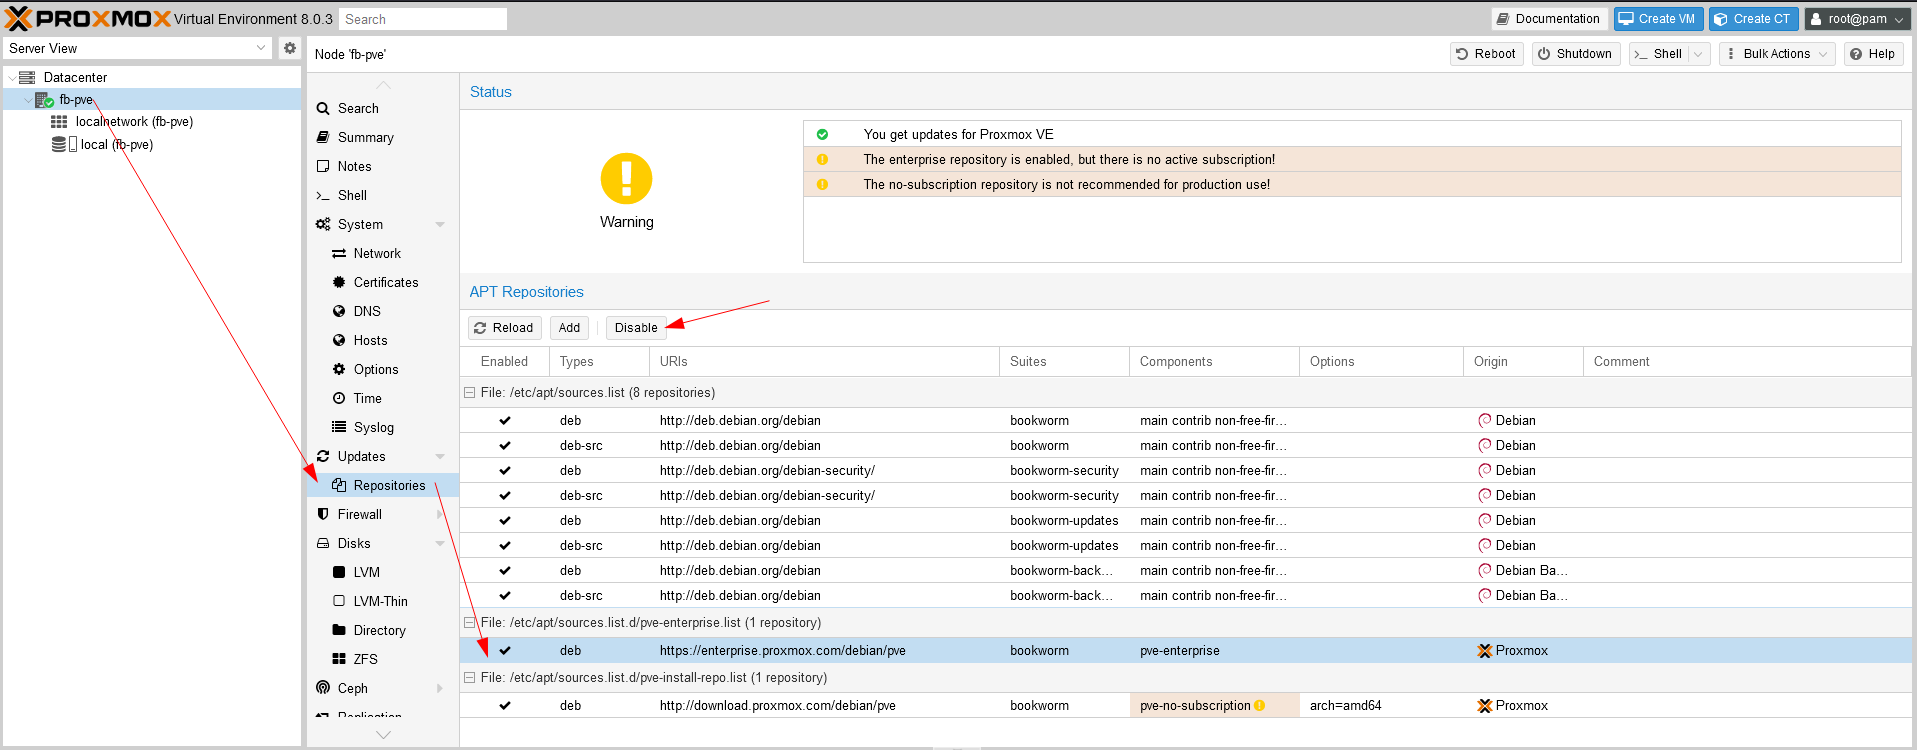
- Click Reload to refresh repository list.

Optional - Change SSL Certificates
If we have other SSL/TLS certificates, we can add it to Proxmox nodes so that we don’t use the self sign certificate.
Select nodes, then go to Certificates menu and
Upload Custom Certificates.

Fill in the Private Key and Certificate Chain.
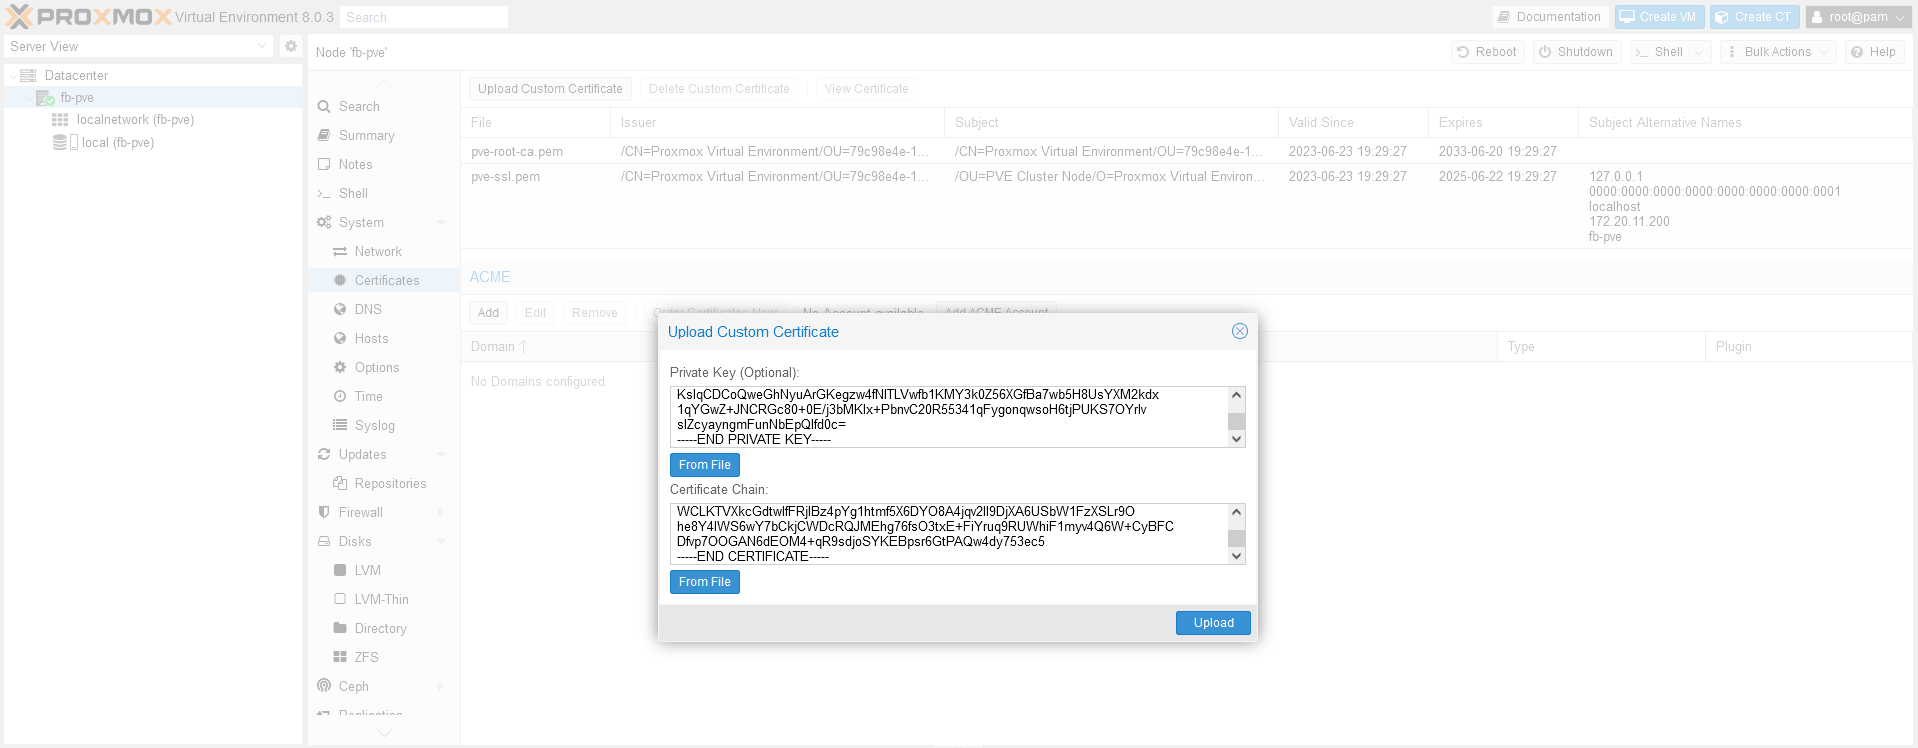
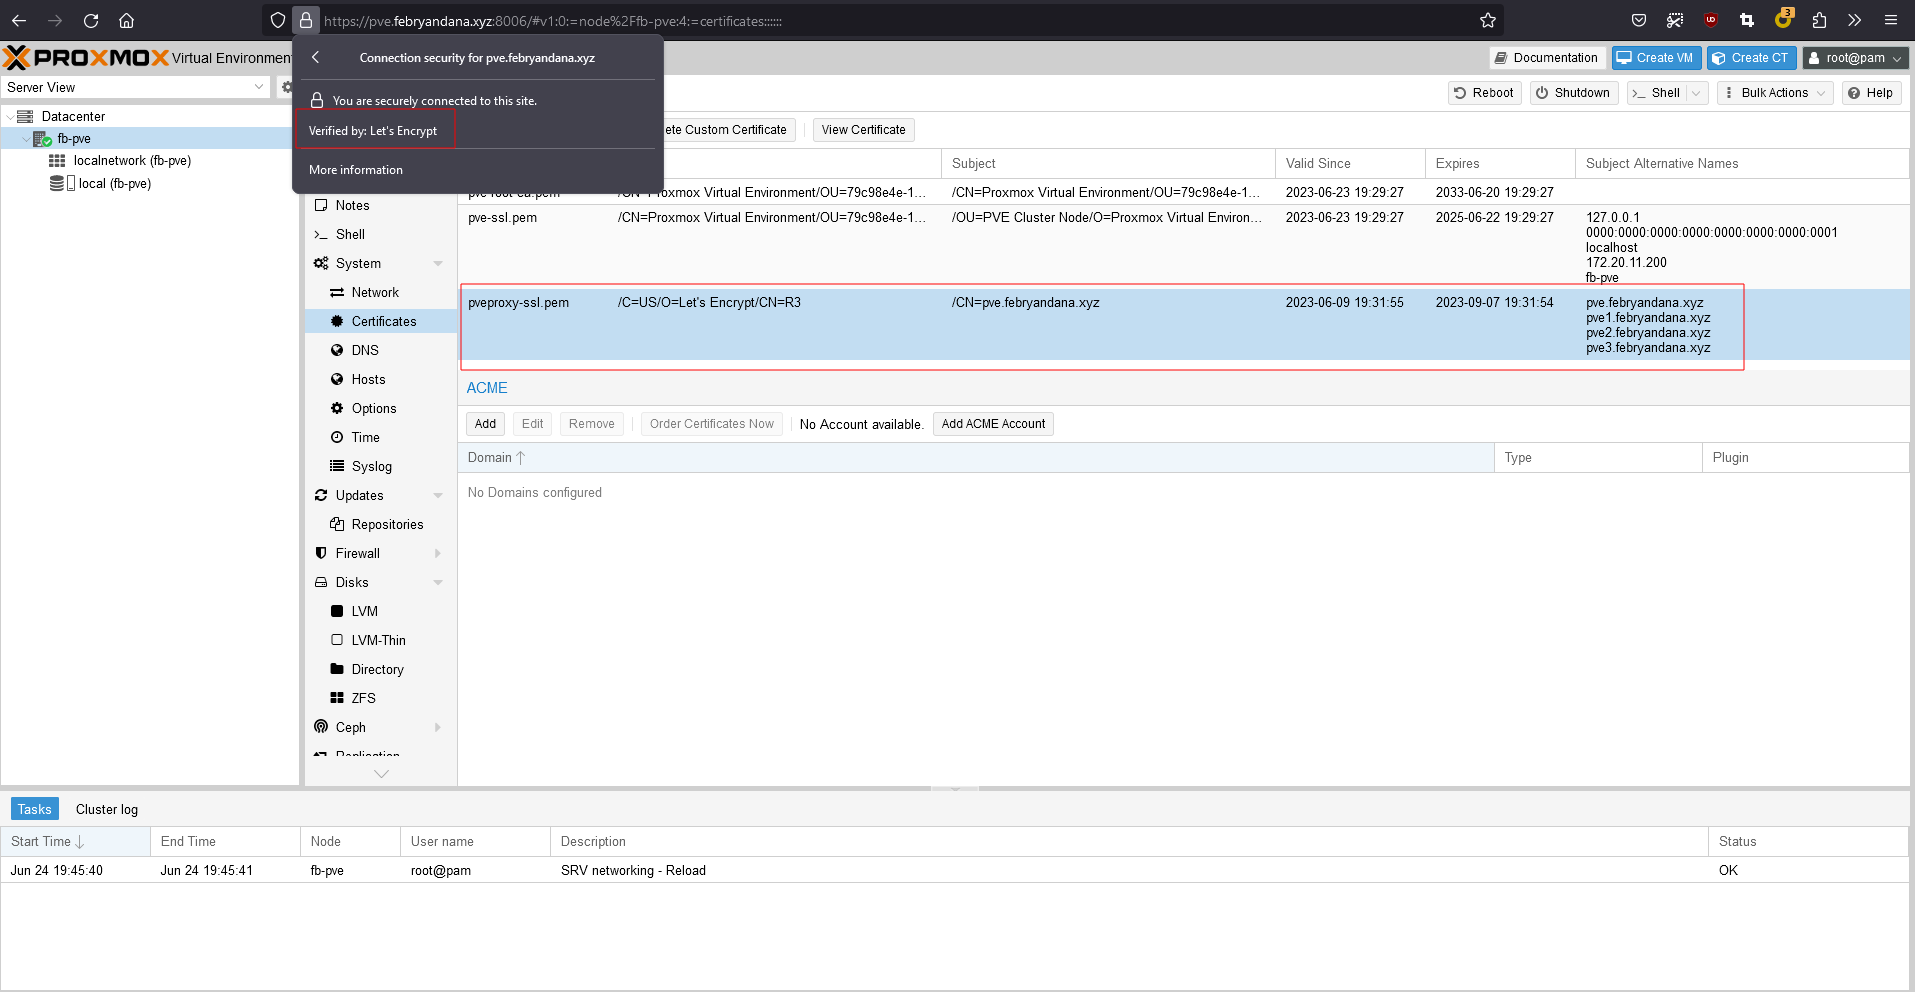
After uploading custom certificates, Proxmox will automatically use this certificates as default. Refresh the Proxmox tab to take effect.
ZFS Configuration
Enable ZFS Module
Before using ZFS, we need to enable it on Kernel module using modprobe.
1
modprobe zfs
Wipe Disks for ZFS
Via Webpage
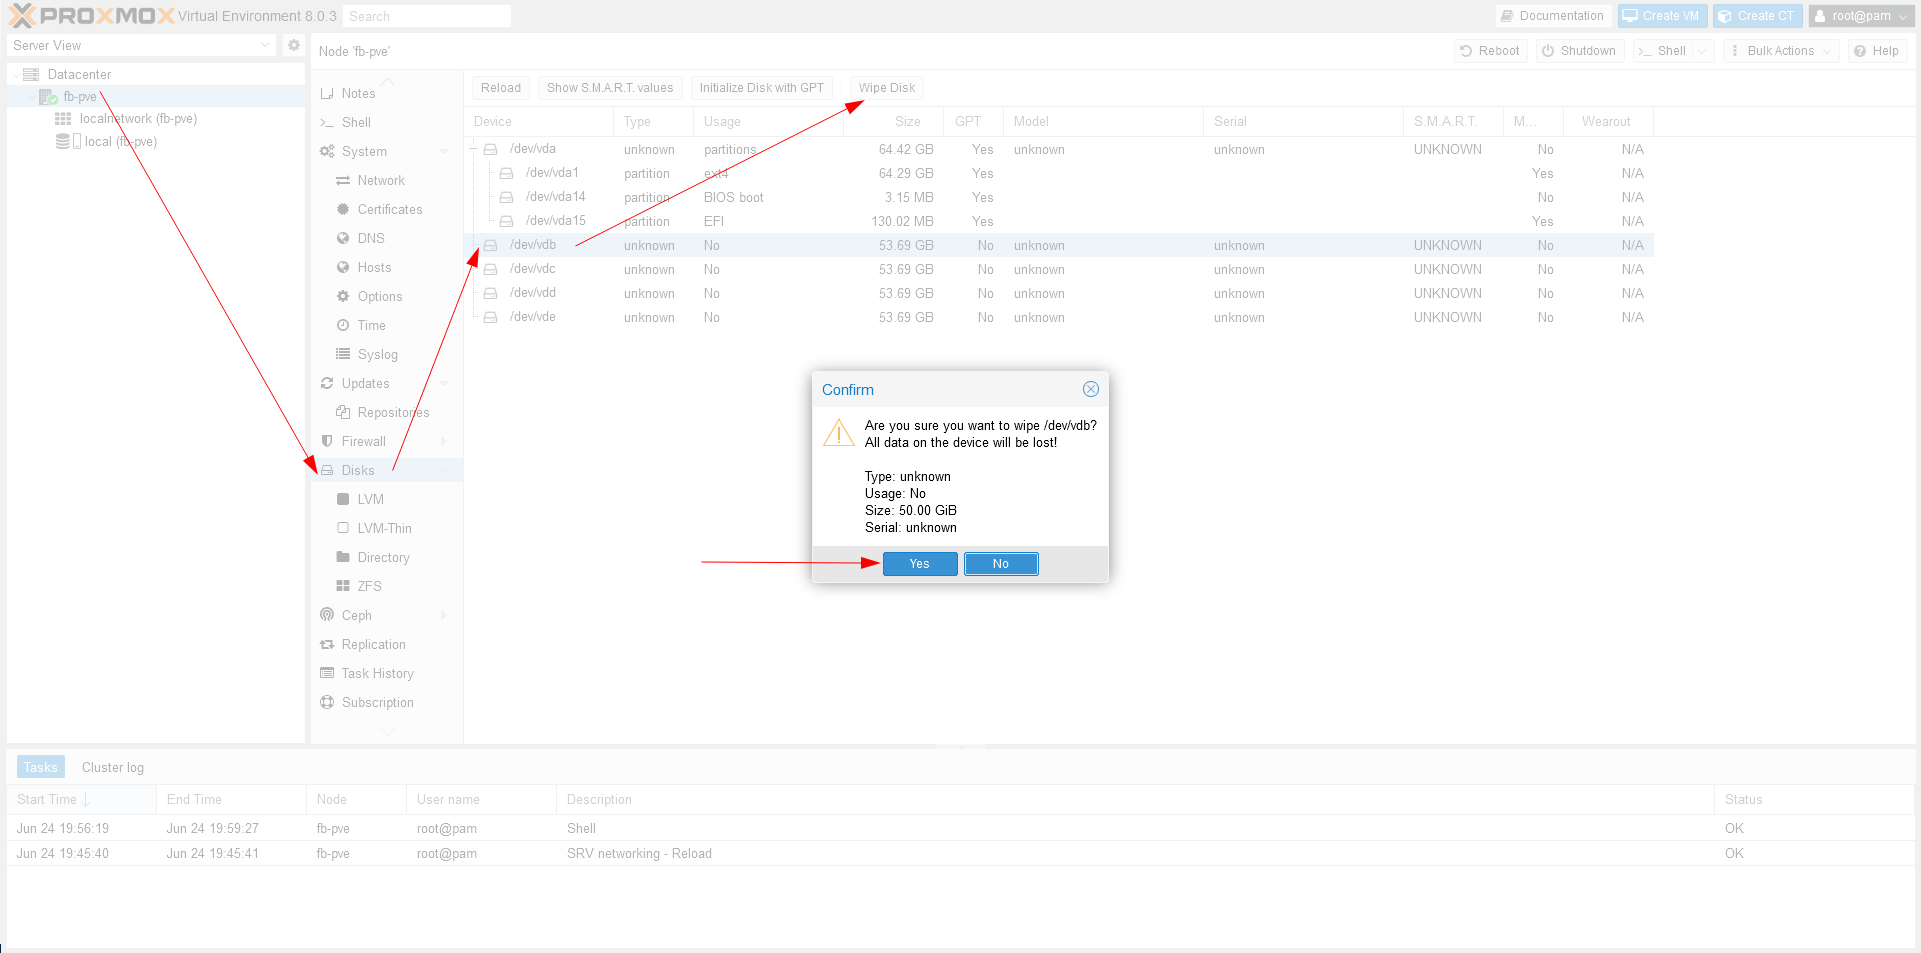
- Go to Disks menu on Proxmox node.
- Select disk that we want to wipe.
- Click Wipe and confirm.
Via Command Line
Go to Proxmox shell and wipe our ZFS disks with dd.
1
2
3
4
dd if=/dev/zero of=/dev/vdb bs=512 count=1
dd if=/dev/zero of=/dev/vdc bs=512 count=1
dd if=/dev/zero of=/dev/vdd bs=512 count=1
dd if=/dev/zero of=/dev/vde bs=512 count=1
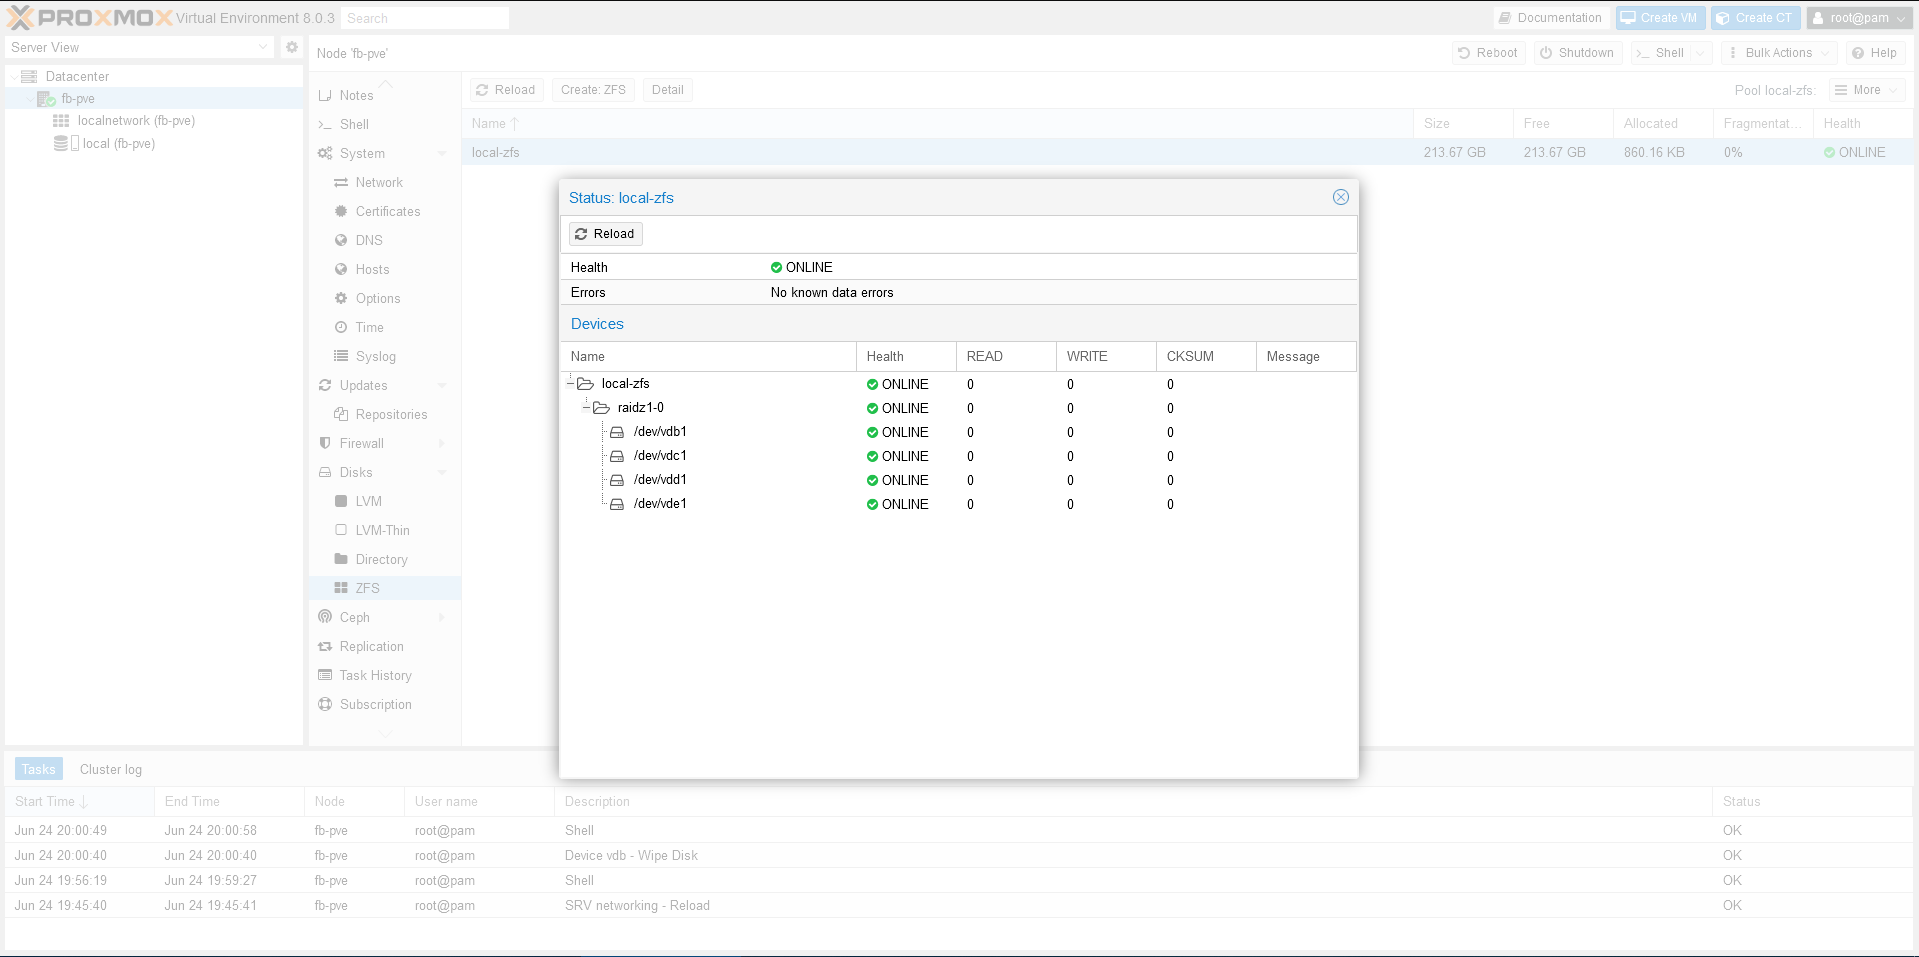
Create ZFS Pool
Via Webpage
- Go to Disks menu on Proxmox node.
- Select ZFS from drop down menu.
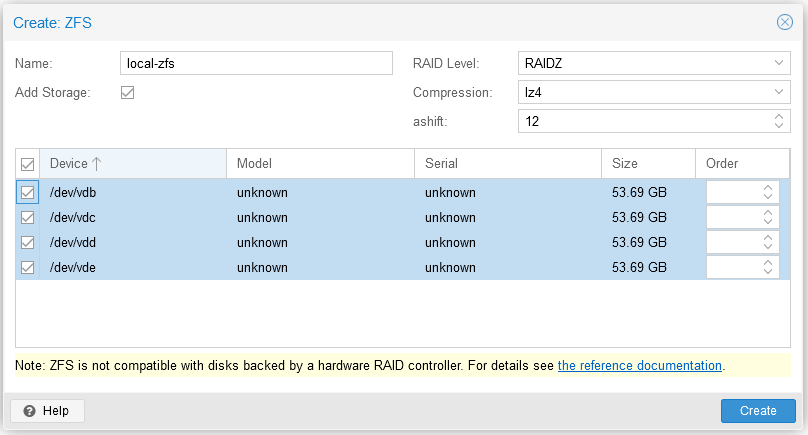
- Click Create: ZFS.
- Fill in information and click Create.
Via Command Line
1
2
3
zpool create -f -o ashift=12 local-zfs raidz vdb vdc vdd vde
zfs set compression=lz4 local-zfs
zpool list

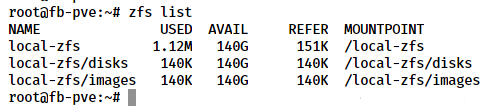
Create ZFS Dataset
1
2
3
4
5
zfs create local-zfs/disks
zfs create local-zfs/images

zfs set compression=zstd local-zfs/images
zfs set relatime=on local-zfs/images
Proxmox VE Storage Configuration
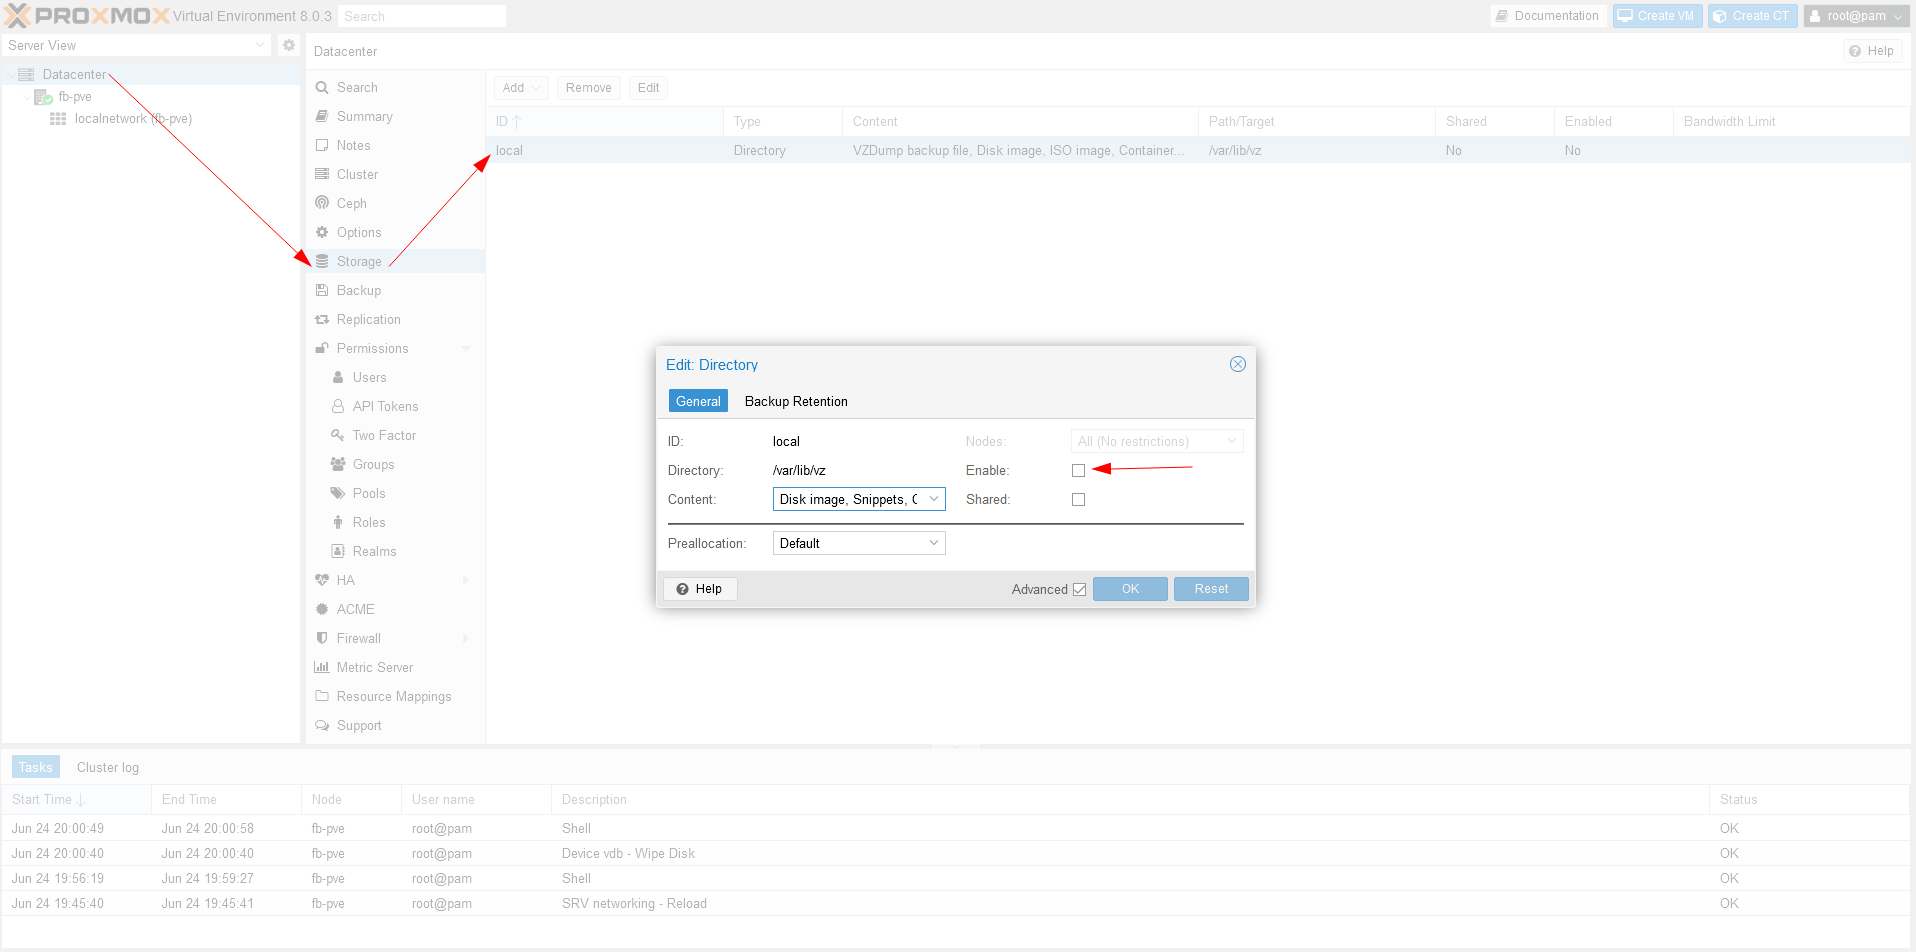
Disable local Storage
If we use other type of storage, we should disable the local one to avoid mistake choosing it to store data.
- Select Datacenter
- Select Storage, then select local
- Edit and uncheck Enable box then click OK
Add ZFS Dataset as VMs and LXCs Disk Datastore
- Select Datacenter.
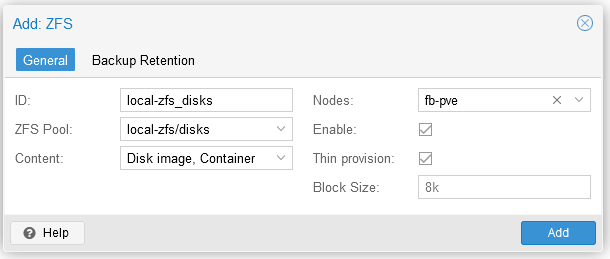
Select Storage, then Add ZFS.
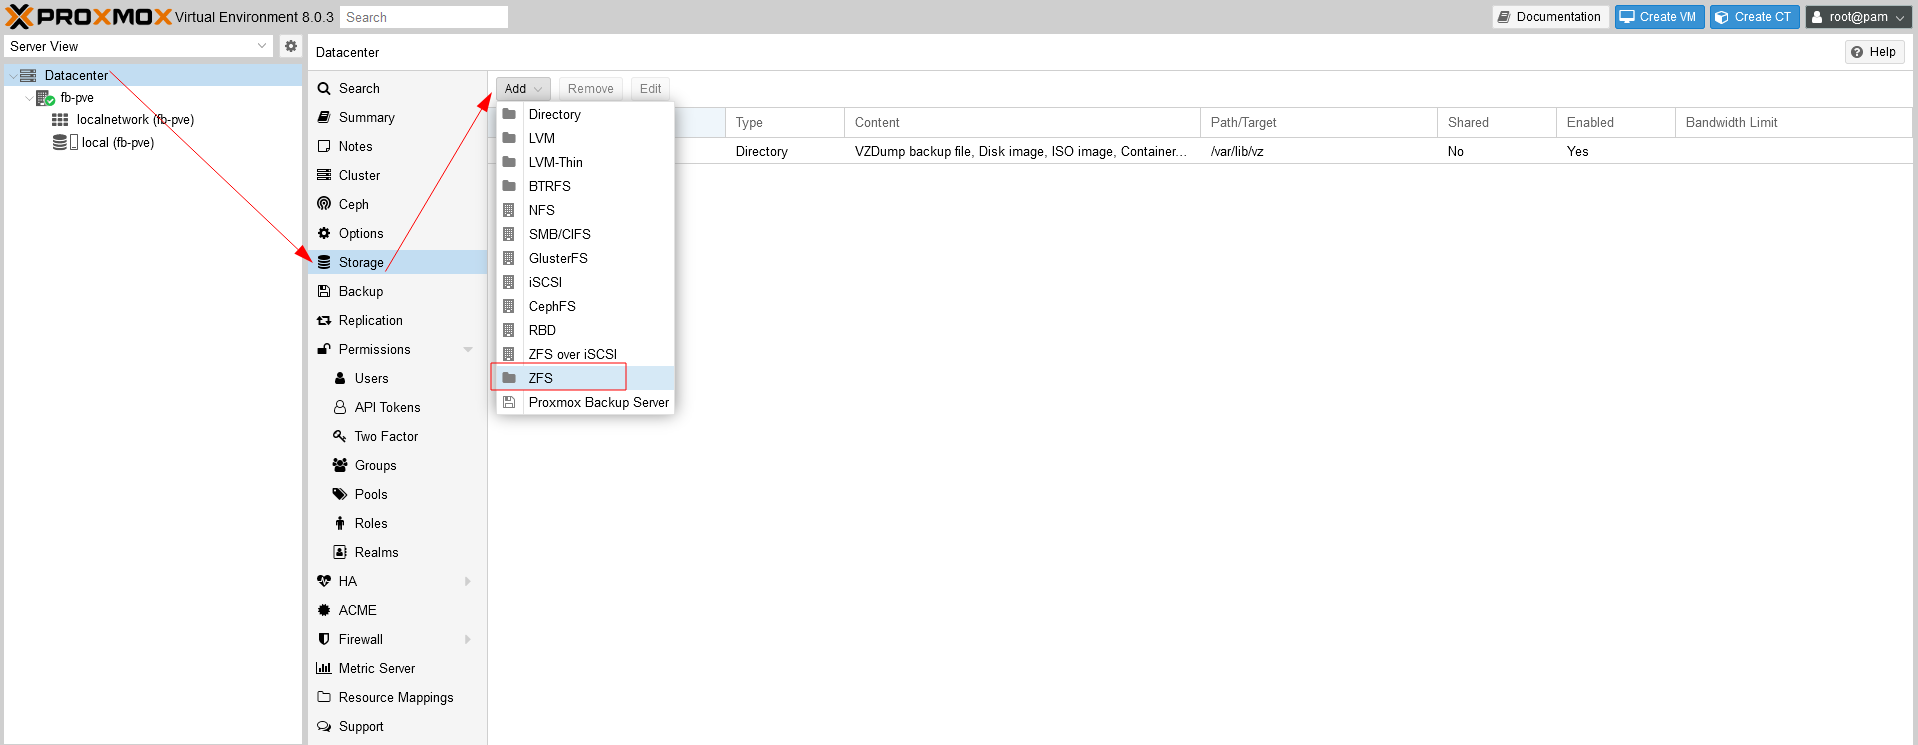
- Fill in information about zfs pool for storing disks, then click Add.
Add ZFS Dataset as ISOs and Templates Datastore
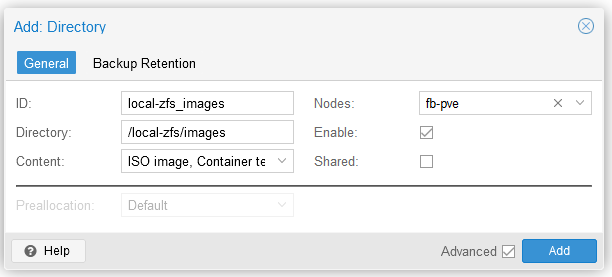
- Select Datacenter.
Select Storage menu, then Add Directory.
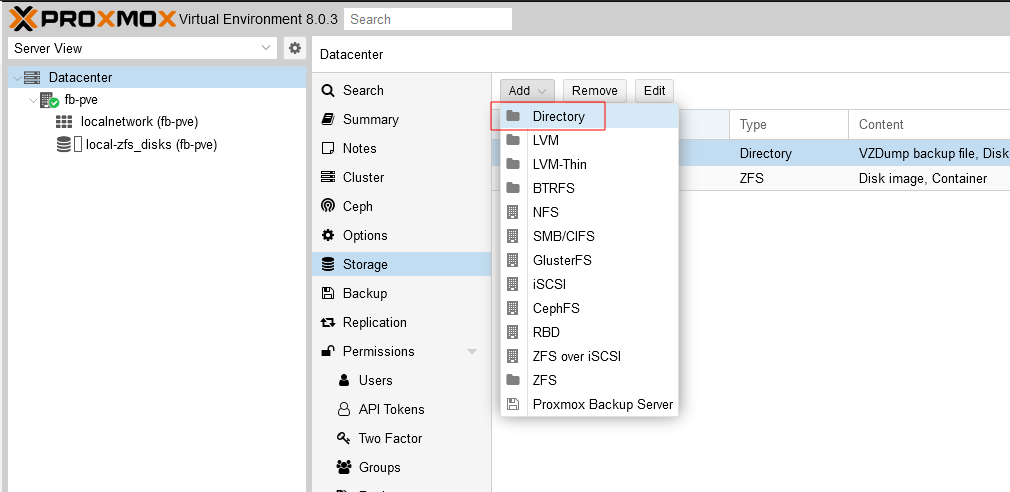
- Fill in information about ZFS pool for storing images and templates.
Below is the Storage list that we use for Proxmox VE. We have local-zfs_disks for storing virtual machine and container disk images, and local-zfs_images for storing ISO, template, and backup files:
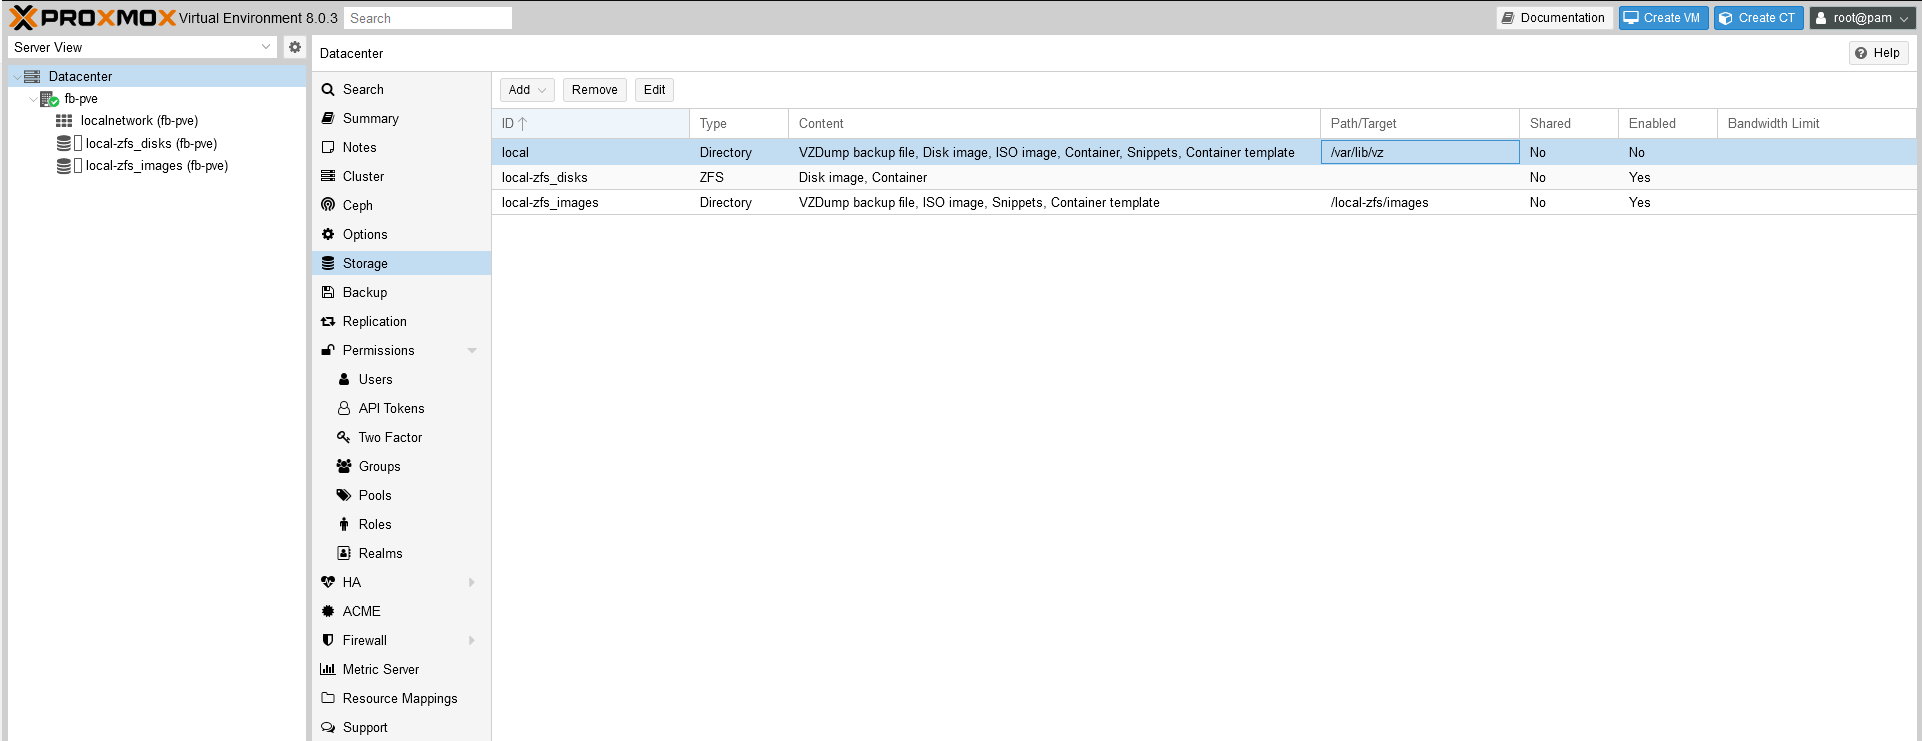
Now our Proxmox VE 8.0 server is ready and we can start using it by uploading new ISO files, creating VM and containers, and many more.
Comments powered by Disqus.