Proxmox 101: Create Virtual Machine and Template from Cloud Image
Create VM for Generating Template
- Click Create VM to start
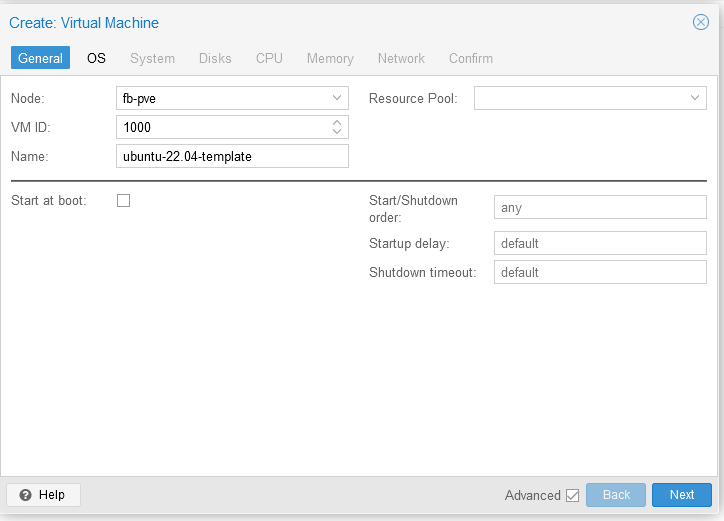
Insert PVE Node, VM Name, VM ID, check if we want to start the VM right after creation, and optional parameter for start and shutdown command
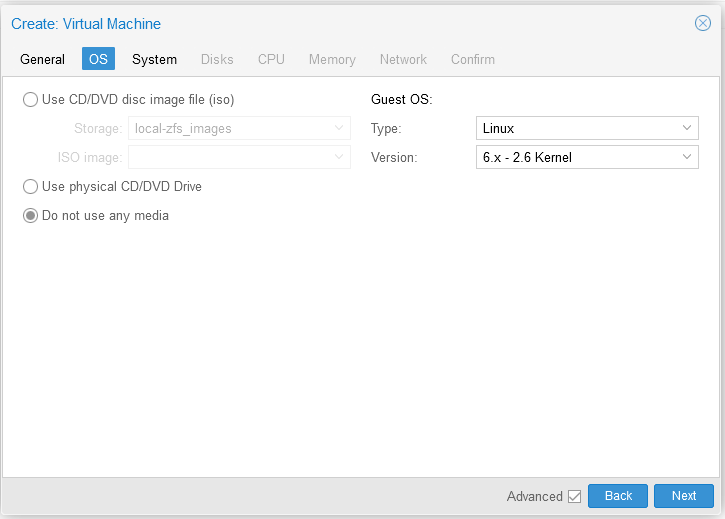
Choose do not use any media because we will import it using cloud image disk later
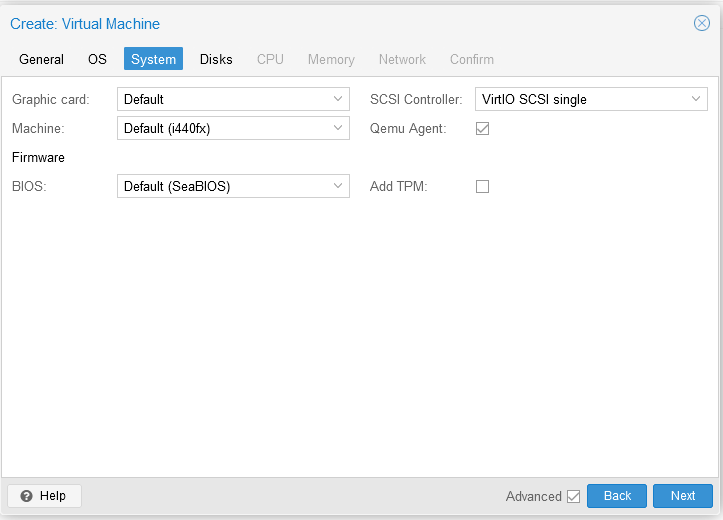
Select driver for graphic card, SCSI controller, and machine type that we want to use. We can also check qemu guest agent to add some additional features betweeen VM and Proxmox later
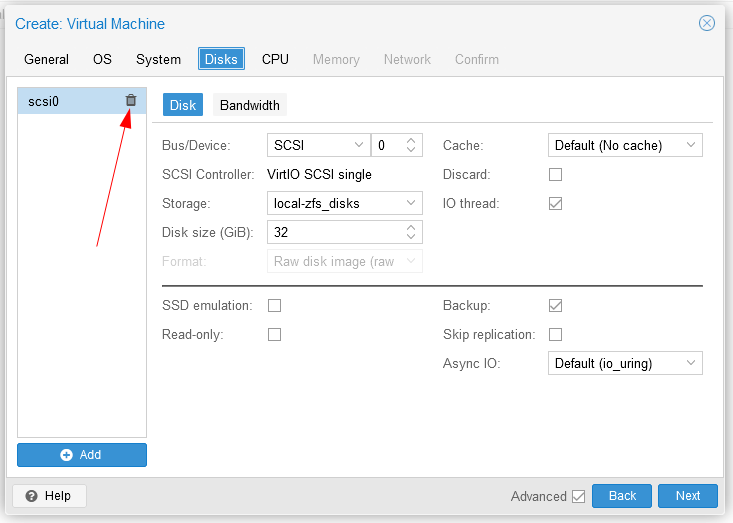
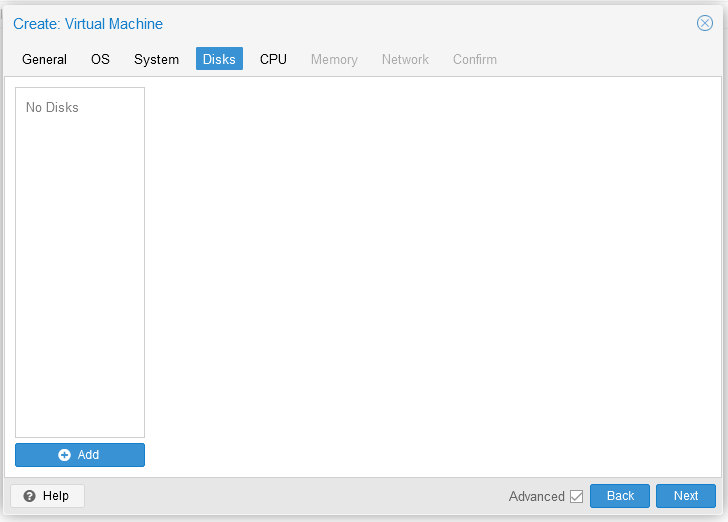
This is where its differ from how we create VM using ISO file. We don’t need to add new disk because we will use our imported cloud image disk later. So remove the SCSI disk and leave it blank
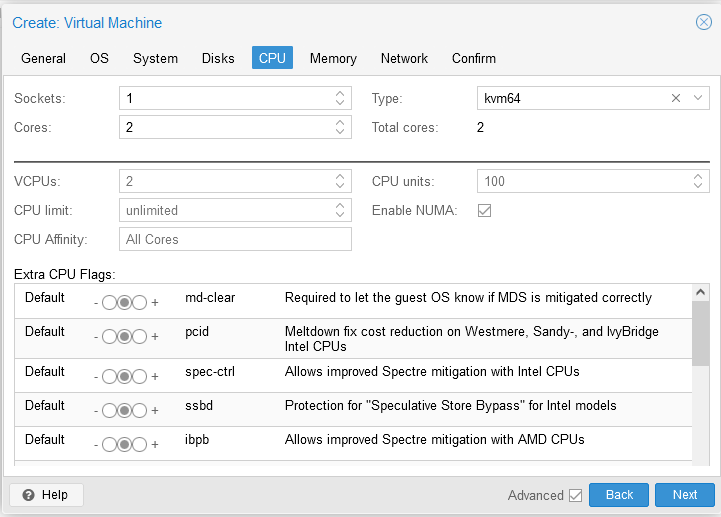
Next we can configure how much vCPU we want for VM to use. We can also configure some optional parameter related to CPU like NUMA, AES encryption, and many more
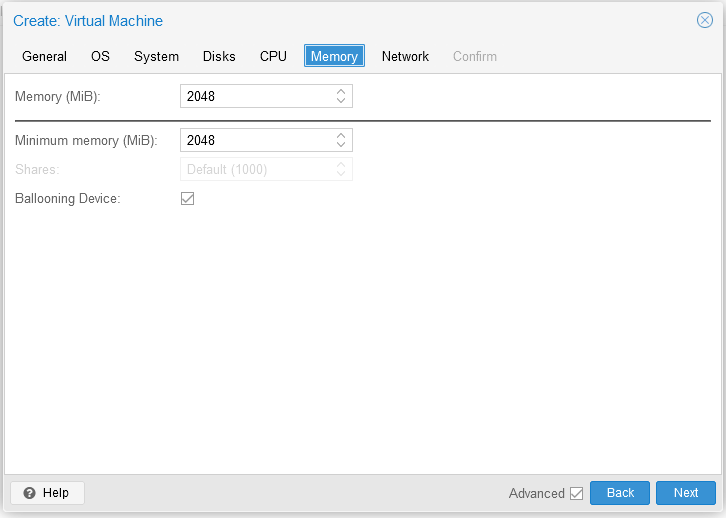
Next is to configure how much memory (RAM) we want to use for our VM.
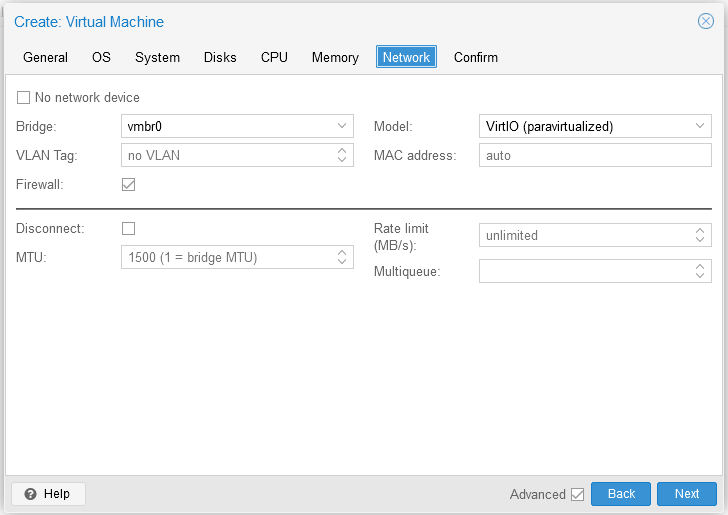
Last step, we can configure network device for our VM here
Make sure to not overestimated CPU and memory to avoid high resource usage and resource fighting between VM and Host
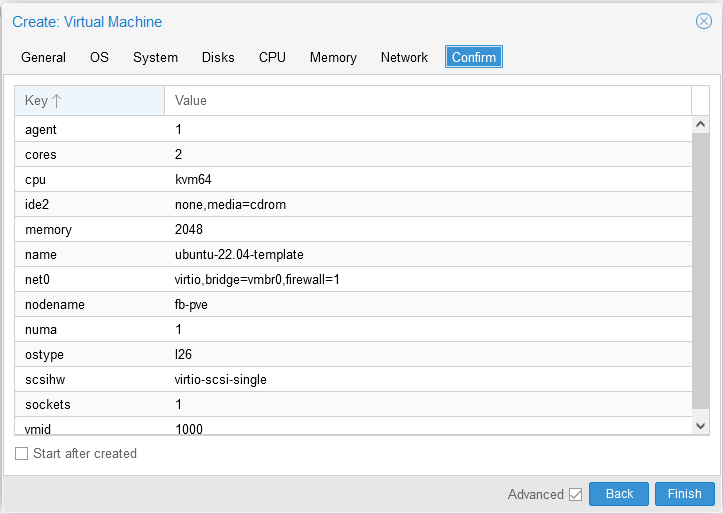
Overview before we start the VM creation. If you are sure about your choice and configuration, start create VM by clicking finish
- Next step is importing cloud image file to Proxmox VE disk storage and use it as our VM boot disk
Import Cloud Image Disk File into VM
For this step, we need access into Proxmox host either by using SSH or via Console menu on Proxmox VE
Download cloud-image file and resize it to give more space for our VM
1
2
3
 wget https://cloud-images.ubuntu.com/jammy/current/jammy-server-cloudimg-amd64.img -O /tmp/ubuntu-22.04-cloud.img

 qemu-img resize /tmp/ubuntu-22.04-cloud.img 20G
Check our disk storage format
- If you use directory based storage like local directory or NFS, use qcow2 format when importing it to utilize the live snapshot feature.
- If you use block based storage lika ceph, lvm, or zfs, by default they will use RAW format.
- Use
pvesm statusto check what is your datastore format.
1
 pvesm status

As you can see above we have zfspool for our disk storage so we will use RAW format.
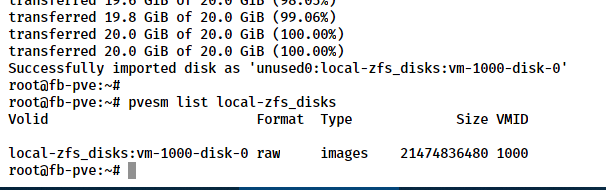
Import cloud image file to disk storage
1
2
3
4
5
 # For RAW format
 qm importdisk 1000 /tmp/ubuntu-22.04-cloud.img local-zfs_disks

 # For qcow2 format
 qm importdisk 1000 /tmp/ubuntu-22.04-cloud.img local-zfs_disks --format qcow2
We can check our disk images using command:
1
 pvesm list local-zfs_disks
Edit VM Hardware for Template
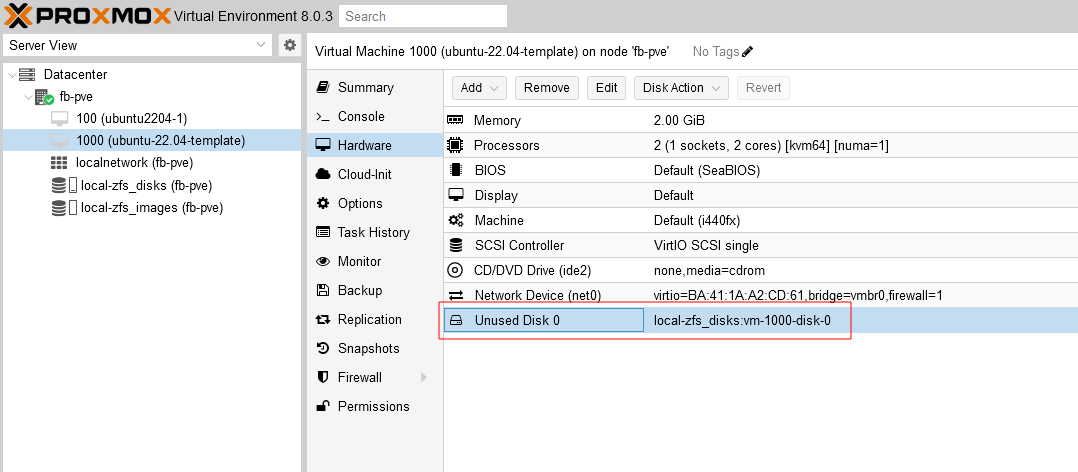
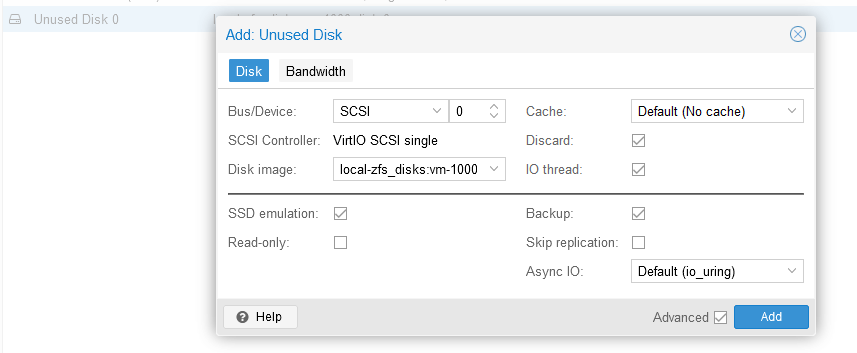
After successfully import the cloud image, it will shown as unused disk on our VM. Double click it to edit. Check discard to use thin provisioning and check SSD emulation for better performance if your disk storage is using SSD
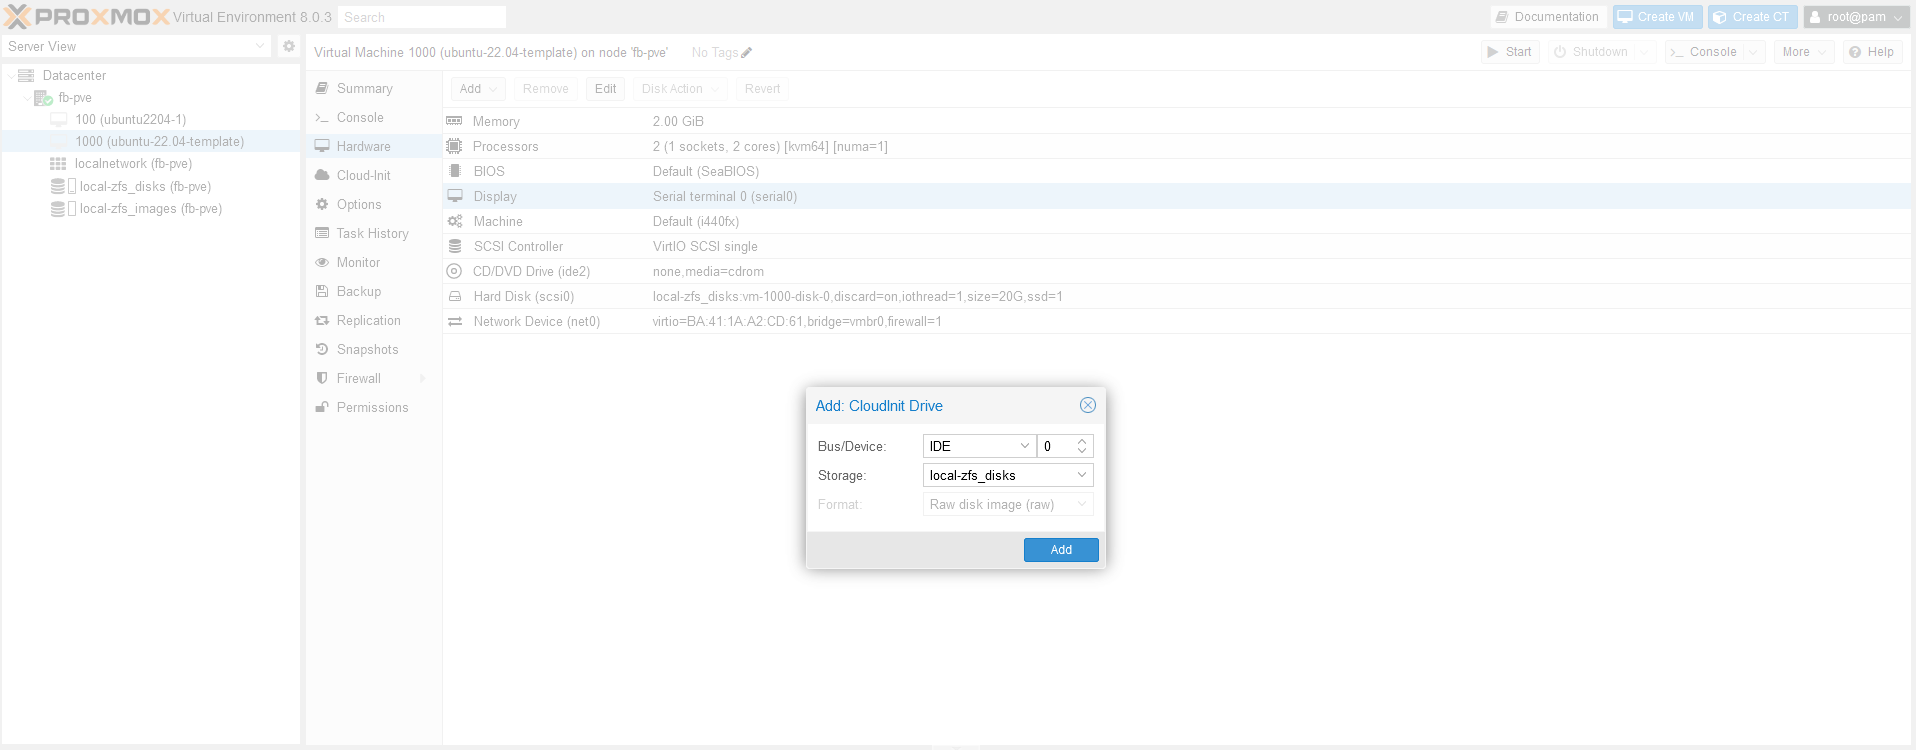
From the same Hardware menu, add CloudInit driver to our disk storage with IDE bus driver
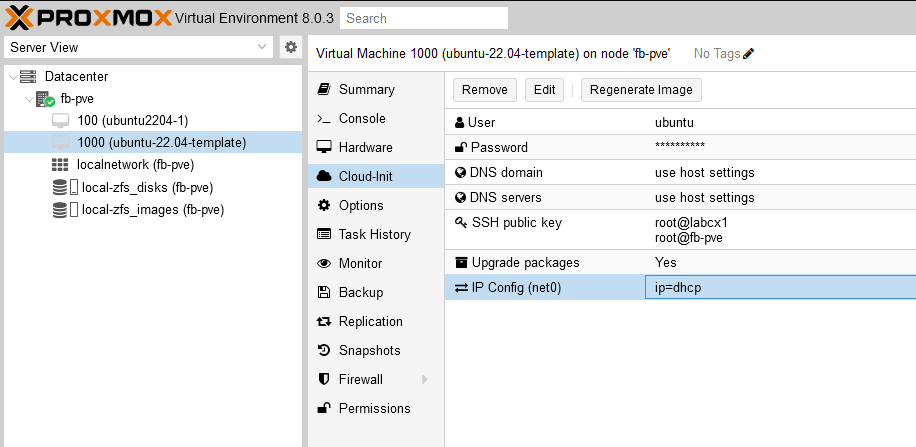
Move to CloudInit menu, double click each variabel and give it the value you need. For example, below is my CloudInit value:
Variabels Values User ubuntu Password secretpassword DNS domain febryandana.xyz DNS servers 1.1.1.1 SSH public key root@labcx1 and root@fb-pve Upgrade packages Yes IP Config ip=dhcp Then click Regenerate Image to refresh our CloudInit image
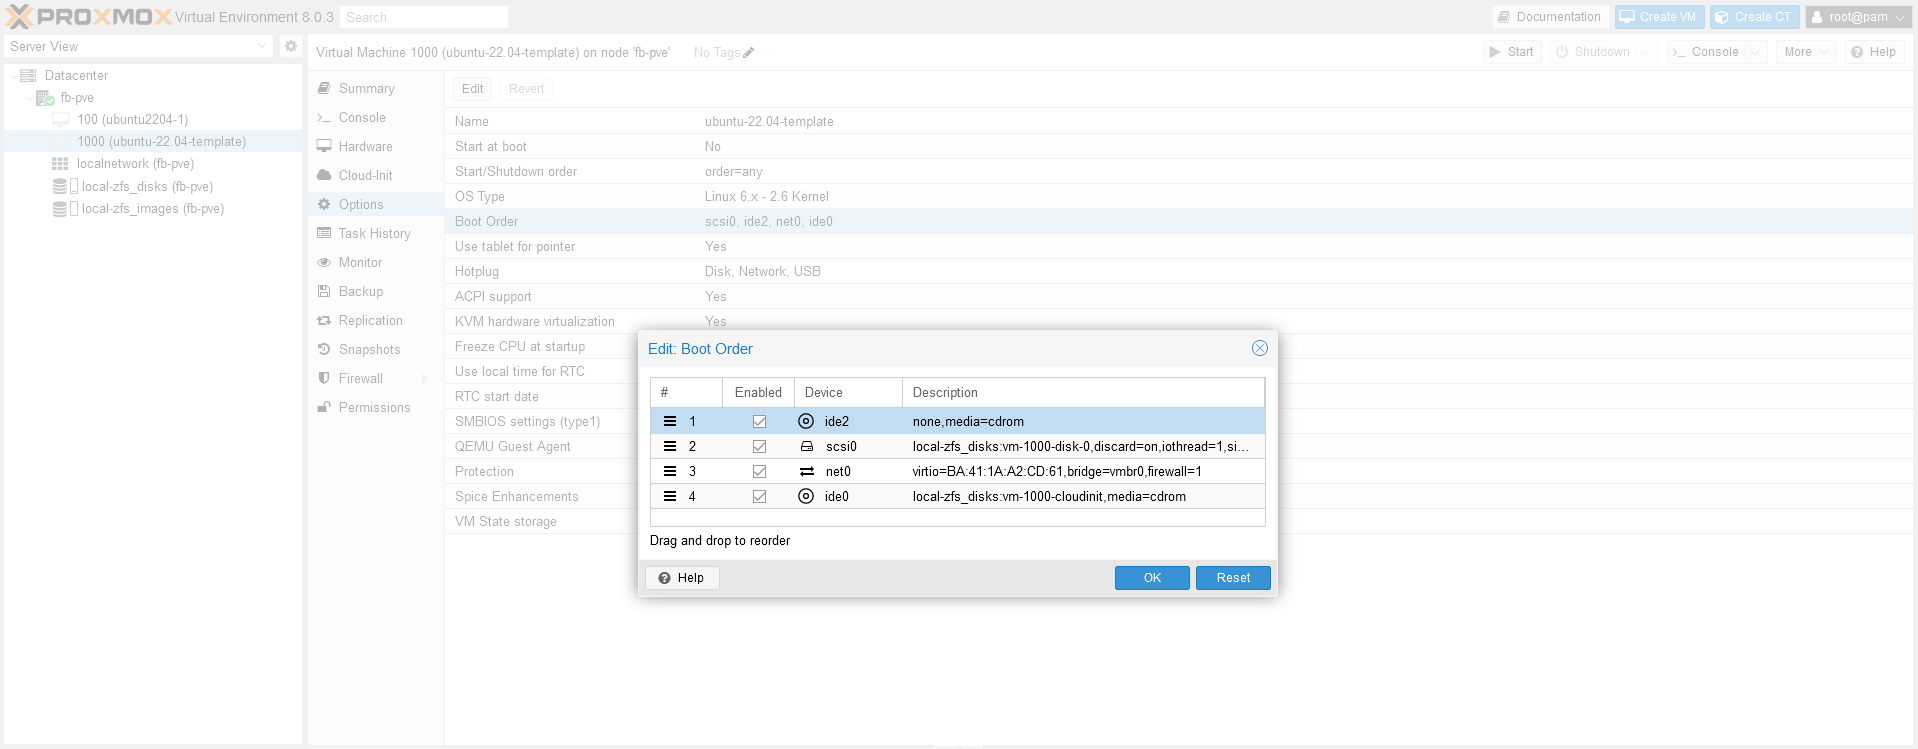
Next we modify our boot order and choose scsi as our second boot device, below ide2 (cd-rom)
Start and Configure VM Before Convert It as Template
We need to configure some things before converting our VM into template. We cannot revert the VM after convert it to template so be careful.
Power On VM and open console

Upgrade system packages
1
2
 sudo -i
 apt update && apt upgrade -y
Install qemu-guest-agent and other packages that you need
1
 apt install qemu-guest-agent net-tools tree
Enable qemu-guest-agent
1
 systemctl start qemu-guest-agent
Reset machine-id
1
2
 cat /dev/null > /etc/machine-id
 cat /dev/null > /var/lib/dbus/machine-id
Clean CloudInit configuration
1
 cloud-init clean
Shutdown VM
1
 shutdown -h now
Convert VM to Template
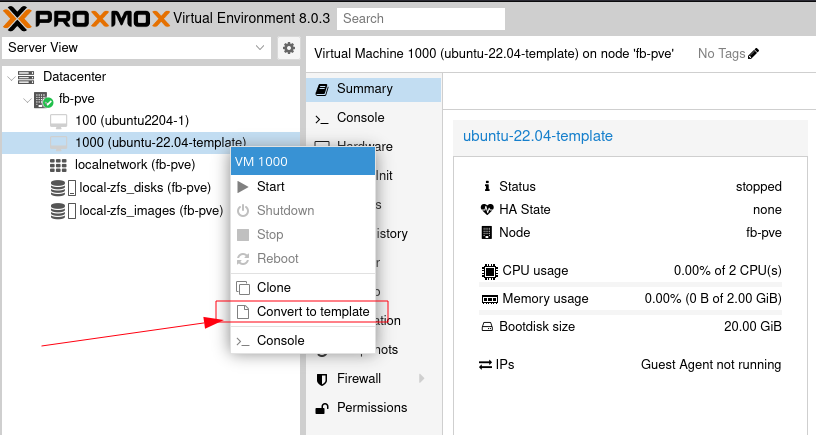
This action cannot be reverted. Make sure you have done all steps above before proceed
Right click on VM ID, then choose Convert to template:
Clone Template to Create New VM
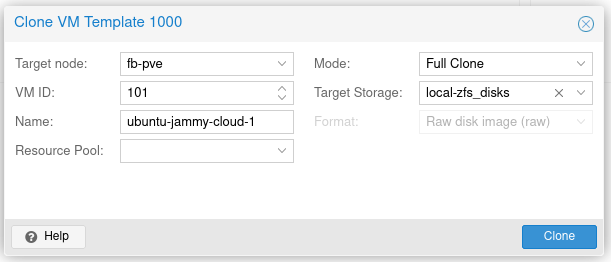
Right click on VM template, then choose Clone
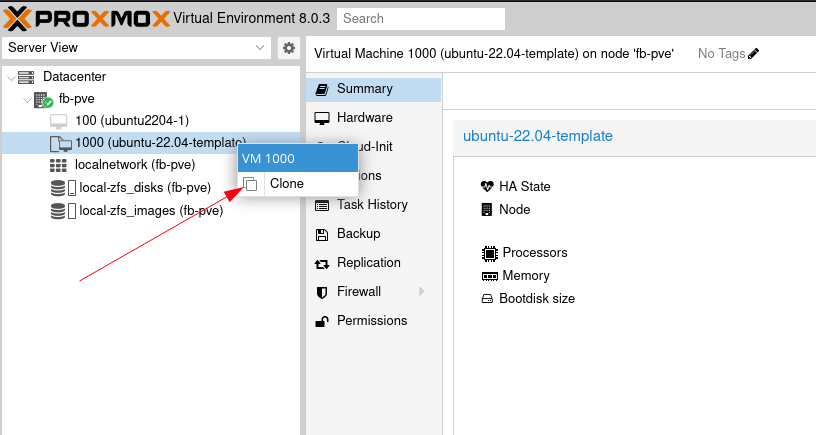
Fill in additional information, then click Clone
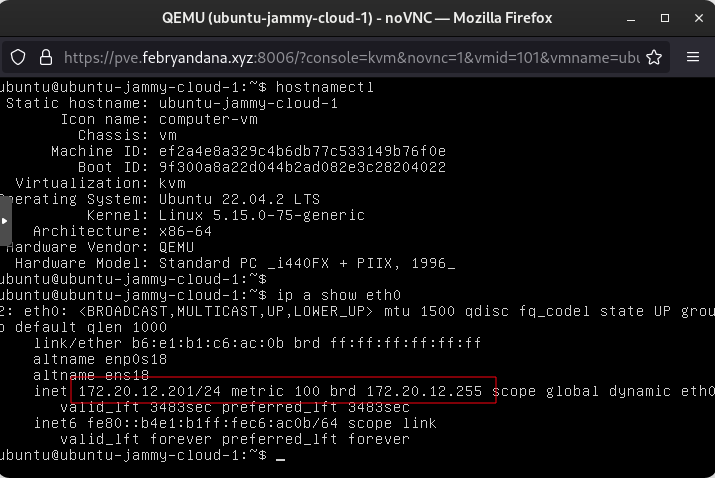
After VM creation is complete, start the VM and check if our template and CloudInit config running properly
You can see that our hostname and IP address changed properly from our template. The SSH public key also injected so it’s mean that our CloudInit is working.
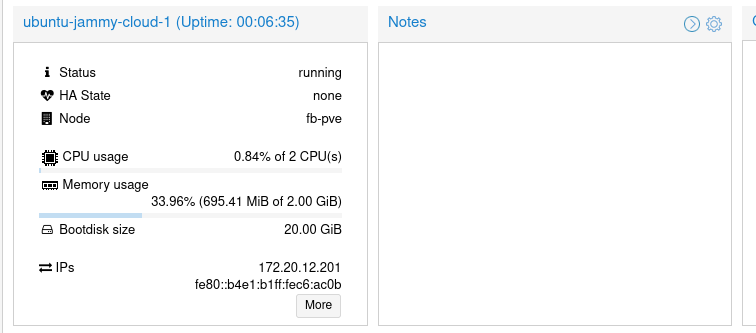
Because we install
qemu-guest-agentearlier, we can also check our VM’s IP Address directly from Proxmox VE dashboard without needing to connect to VM console. This is good if we want to access the VM from SSH without needing to use Console.
And there we have it! An Ubuntu 22.04 server template for our next VM. With this template, we don’t need to dwell in OS installation everytime we want to create new VMs.
I hope you find this guide helpful and see you on another time.
Comments powered by Disqus.